When creating an AR experience, there are many ways to load up and place the experience.
The most common ways are to have an image target (ex: a photograph) where the phone scans and places the augmented reality over the target OR a hit-test where the user taps to place the AR experience in their preferred location.
However, there is another way that can also work for setting up AR and that is using the environment as a target. We tried this using Adobe Aero.
In order to try this, you must take a picture straight on of your desired space.
You can then go into Adobe Aero and click on the anchor. You can select the option that tells it to load your own image target. Upload the picture you have taken.
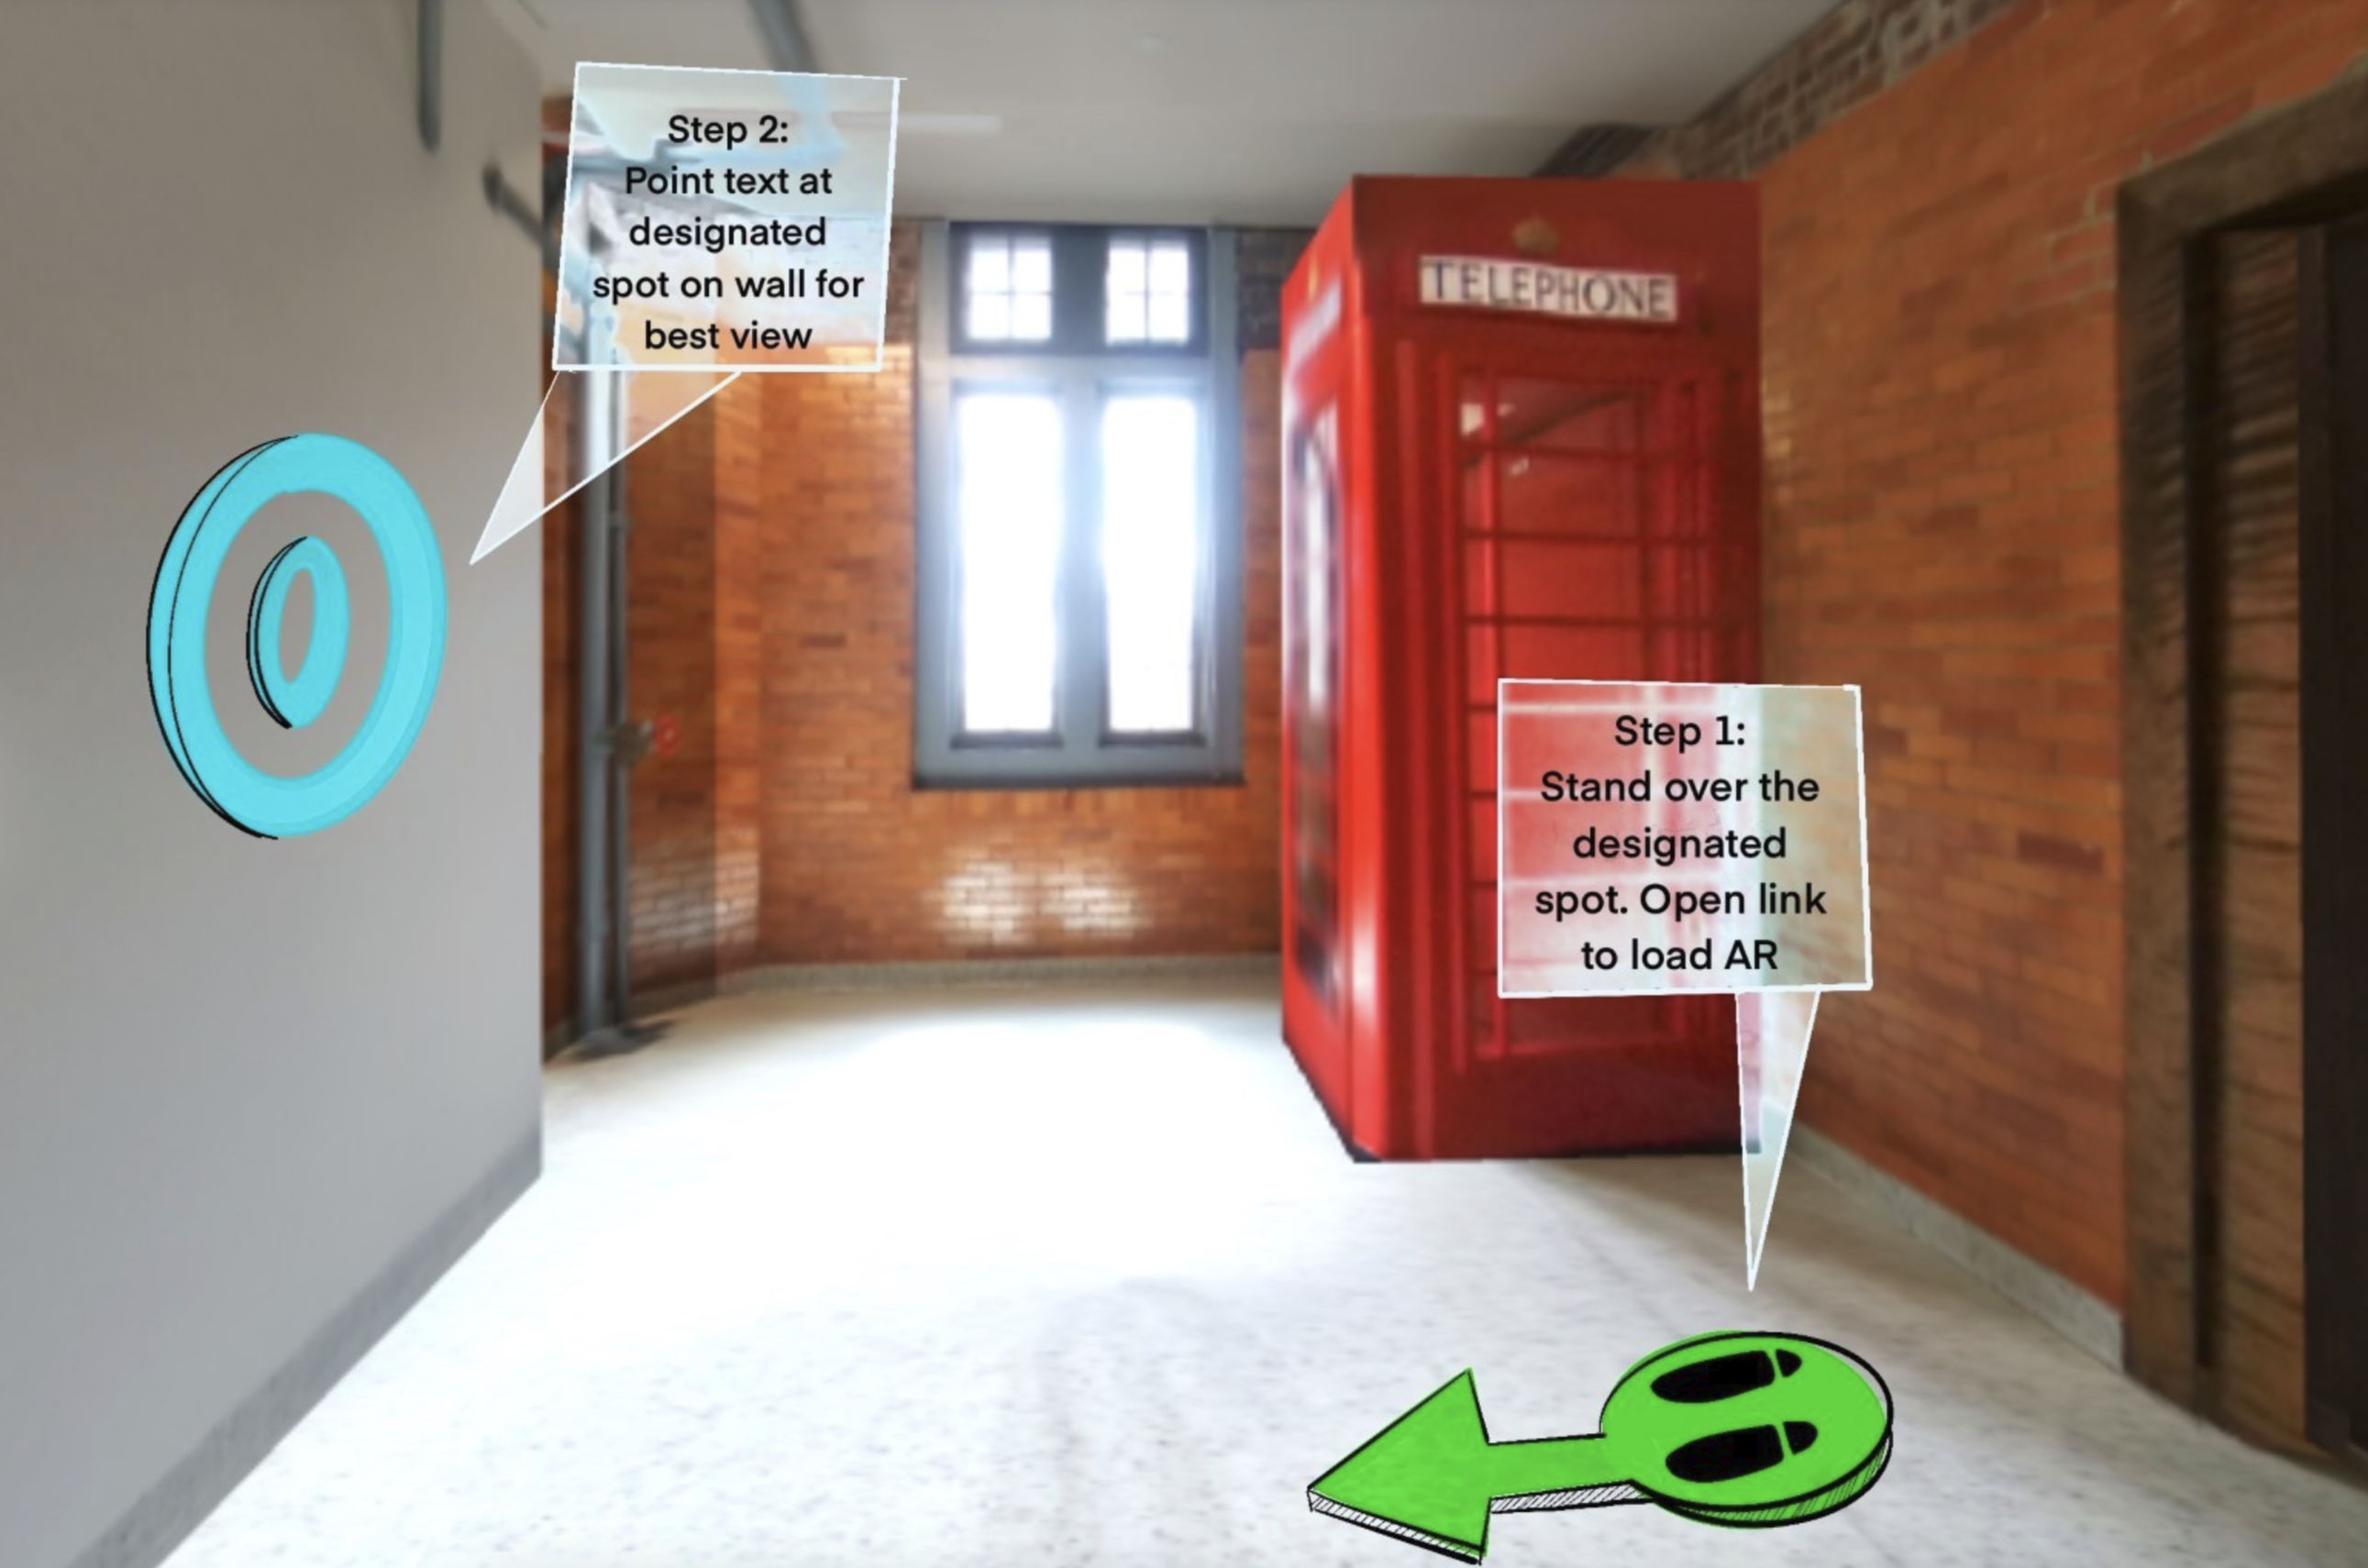
After situating your AR models and animations and interactions, you can then open up the experience.
It will show you your image marker that it is tracking and by using your phone move to match the position in the image and your AR marker will appear.
Pros:
Great for stationary experiences or head-on experiences that are more centralized to a certain location. Could be great for an art piece or museum exhibit where you walk by a set up.
Cons:
Not great with reflective surfaces and moving left to right causes it to confuse the AR. The more depth you have, like a hallway, the less mobility you have around your AR experience.