Basic Props in Blade 2.6
NOTE: Blade 2 in the lab handles subject calibration differently than Blade 1.7. We will be using Blade 1.7 for all postproduction work.
Types of files in Blade:
ENF - eclipse database handle
x2d - raw capture data (12 camera views)
xcp - calibration file for the take (camera configuration and settings)
vst and vsk - Vicon Skeleton file (t is a template, k is customized template)
hdf - Blade file (created via Save As)
fbx - filmbox file, a common standard for exporting data, can contain markers and skeletons as well as geometry
bvh -
biovision hiarachy, also a common standard for exporting motion data, contains only skeletal motion
c3d - a common standard for exporting motion data, contains only 3d point data
csv - excel spreadsheet file format an option for exporting point data as text
Vicon Virtual System streams recorded data using real-time solving to simulate real-time setups. Blade continues to accumulate statistics on the moving subjects and improves solving over time.Thus VVS is also an easier and often better way to postprocess the data.
Otherwise use Autocleaning Pipeline in the Pipeline Editor
Alternatively:
Prop Calibration
Prop Calibration is a step necessary for automatically labeling markers and solving marker motion to bones in subsequent captures. ROM files that are captured for subject calibration are as short as possible. ROM (range of motion) takes are files where a prop is captured for the sake of calibrating it and saving calibration as a VSK file. For nondeforming props even one frame of data is sufficient. For deformable props a motion showing the potential deformation limits is performed, but the take should be as short as possible.
- Open Blade 1.7. Windows installer will pop up - press CANCEL. Under Main Button find Preferences (near Exit). Under Interface/Selection uncheck ALT key. Use Maya controls to navigate around Blade (ALT+LMB(tumble), ALT+RMB(zoom), ALT+LMB+RMB (pan), ALT+MMB to scrub time.
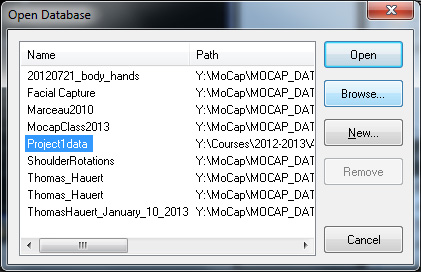
- Main Button/Database Management. In Database Management window click on Open database:
Then Browse, select Y:\Courses\2012-2013\AC7102_Vita_SP13\Project 1\Project1data\Project1data.enf.
The name Project1data should appear in the list of databases on the left side of the window. Select it and click Open.
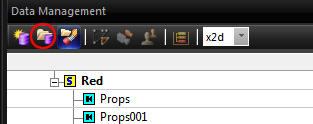
- Click on "+" to expand the hierarchies. Double click on the blue x icon near the take name
 to open a ROM take.
- In Post Processing ribbon click on Reconstruct button.

If more than one prop was captured at the same time, each prop needs to be calibrated separately. Select markers from other props and delete them via DEL key. In the remaining prop shift select markers in desired order . First two selected markers determine the bone orientation (third selected marker determines an UP vector). In the Command line at the bottom of the screen type in AutoPropVST. Check "make sticks" and type in desired prop name. Click AutoPropVST.
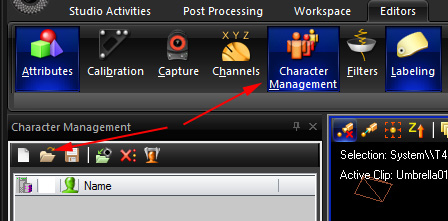
- In Editors ribbon find Character Management. Select the newly made prop and save the VSK file using Character Management interface.
- If you need to calibrate other props in the same take, reopen the take by doubleclicking the blue x button again and repeat steps 4 and 5.
General Postprocessing of Prop Takes
- Double click on the blue x icon . Click Reconstruct button to reconstruct the trajectories.
- In Character Management editor load the newly created vsk(s).
- In Postprocessing Ribbon: press Autolabel. Visually examine if the props are labeled correctly (green stick configuration should be the same as when the VSK was created and green sticks should not stretch between the props) and markers are not shifting relatively to each other. If multiple props are captured, click on Autolabel Options or open the Labeling Editor. At the top of it find Current Character section. Choose a different vsk/character for autolabeling another prop in the scene.
- In Postprocessing Ribbon: press Solve. This should create a bone for each prop. Visually examine the motion to ensure that the bone is following markers correctly.
- Main Button/Export fbx of cleaned motion.
- In Motionbuilder File/Merge.