Editing Human Performance with FCurves and Control Rig, Exporting a Motion Clip.
Once the motion takes (on Mocap Skeleton) are imported and retargeted to the Model Skeleton via Character Settings the link is established between Mocap and Model skeletons to allow Model skeleton to be puppeteered by the Mocap one. The data itself is still on the Mocap Skeleton until the motion is plotted.
To edit the Mocap Skeleton bones you can select them, open the FCurves editor, select Rotation in the left side of the FCurves editor. You can select, move and delete keys that appear to cause problematic motion during short intervals (relative to the speed and detail of motion).
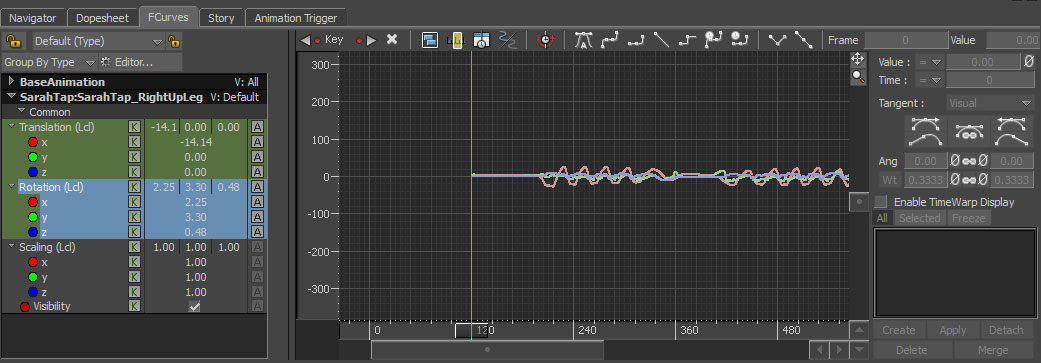
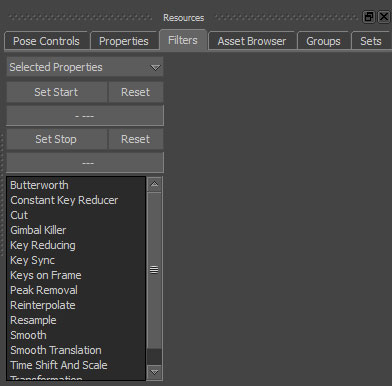
You can also apply Filters: Unroll and Gimbal Killer to read the graph easier and try getting rid of the gimbal flips. Use Peak Removal, Butterworth and Smooth to get rid of spikes and noticeable vibration.
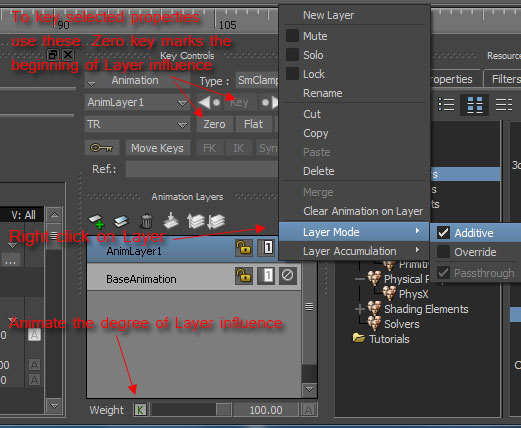
If there are still a lot of flips and erratic motion, it may be easier to use the Control Rig and Animation Layers to overwrite the problematic areas. This is also used to alter motion. Additive Animation Layers add/alter motion, allowing to change the shape of motion.
SAVE SEPARATE FILE AFTER EVERY STEP
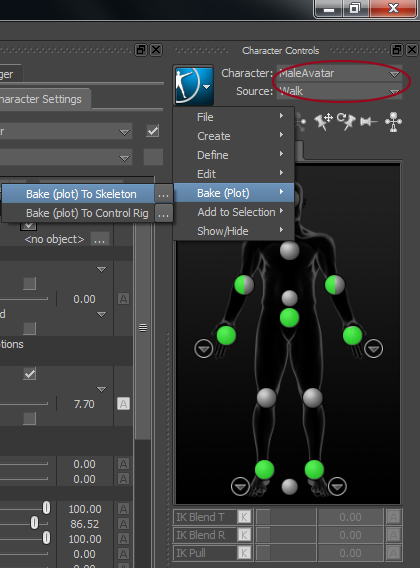
Plot data to Skeleton or Control Rig
Plotting is needed to transfer keys (and downsample if need be) to Model Skeleton or Model Control Rig. If there is no need to overwrite or further edit the data with the Control Rig, you can plot data directly onto Model Skeleton. It is then ready to be exported and can be imported into many other 3d applications. You can also create a motion clip that will be useable to create motion sequences with skeleton. See Step 4 below.
Only one take can be plotted at a time. To plot each take, switch to another take, then switch Model Character input to Character. Then plot.
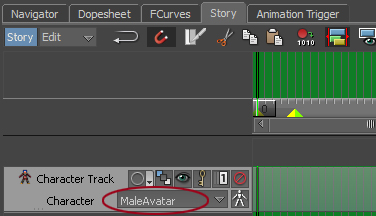
3. Merge Animation Layers when finished editing. (Don't forget to save a copy of your file before you merge layers!) 4. Create a motion clip. Select your Model Character, open Story Window. Right click on the left side of the window. Insert Character Animation Track. Select the proper character.
Right Click on the Character Track and Insert Current Take. Then select the clip that appears on the timeline in the right side of the window and right click/ Export Clip. If you want to export just a portion of your take, specify the section using Transport Controls (start and end frame values) and choose Process Tracks/Subtracks to New Clip.
5. Loop In Place Motion in place (ie walk and run cycles) is very commonly needed in making games and other interactive 3d experiences. In Modifiers section use In Place check boxes to constrain character motions. This setting works only on Control Rigs. Plot the mocap data onto a Control Rig, then check In Place Lock Options.
|
1. Plot data to Control Rig View Digital Tutors video on working with Control Rig Your general steps to prepare the data as motion clips that can be combined to build sequences of motion: 2. Animate on top of mocap data using various Control Rig selection modes (Full Body, Body Part and Selection) and Pinning options (pin translation or rotation). These options are located below the Source menu. Use Override Animation Layers for changing the motion completely. You can key the Passthrough weight.
|
NOTE: at any point it is possible to plot data back and forward from Skeleton to Control Rig and vice versa. Control Rig cannot be exported to game engines and a lot of other applications, so Skeleton is the most compatible data format. However Control Rig allows to edit data further with animation layers. When plotting from Control Rig to Skeleton the layers will have to be merged.