This is intended to be a very quick basic guide to texturing with Mudbox for Project 2
To restore Mudbox back to it's default condition, go the C:/Users/<user name>/Documents/Mudbox and rename 2015-x64 (assuming you are using the 2015 version) to tmp_2015-x64. When you restart Mudbox, it will create a new 2015-x64 directory with default preferences.The only reason to keep the tmp_2015-x64 directory is in case Mudbox is unable to regenerate a fresh directory.
Transfering your Mesh from Maya to Mudbox
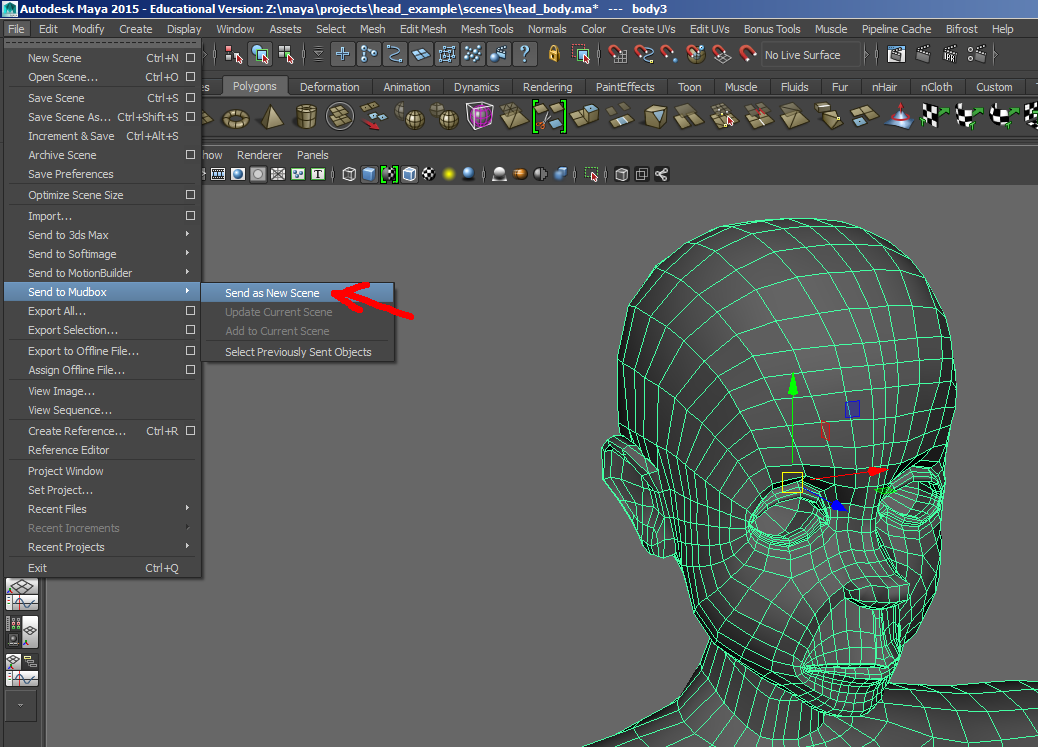
Generally you can select the Mesh in Maya you want to transfer and use File->Send to Mudbox->Send as New Scene
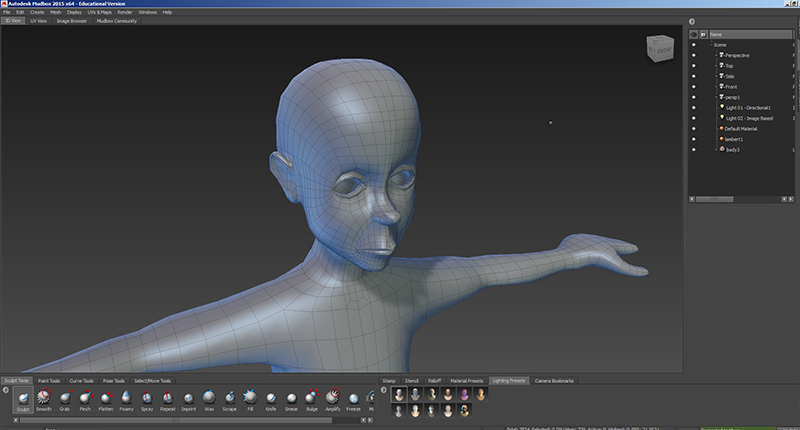
And the mesh should open in Mudbox.
One caveat if you choose to go the Mudbox route, Mudbox is much more sensative to the structure of the mesh and the UV layout than Maya is. You may have to clean up ngons, poles, and UV layout problems.
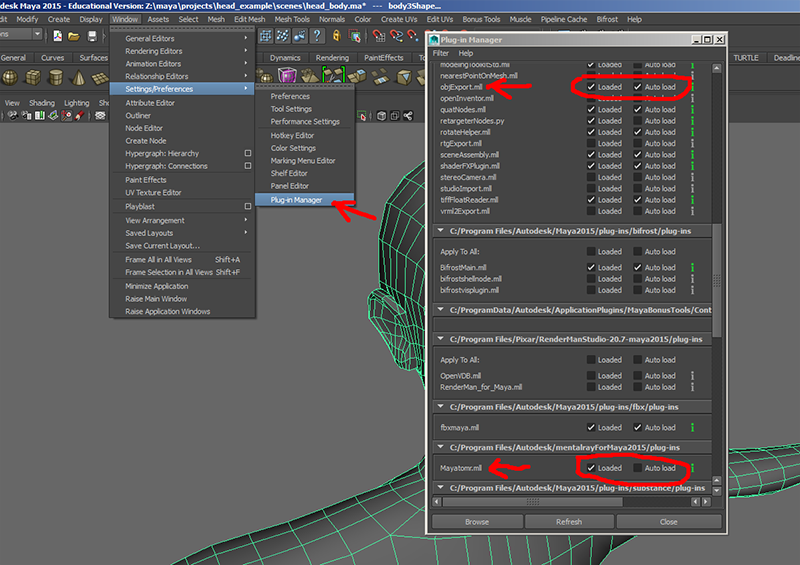
If you are using a different version of Maya and Mudbox (e.g. Maya 2015 and Mudbox 2016) you will need to export am .obj file. To do this you must first make sure the plug in to obj export is loaded. Open Window->Setting Preferences->Plugin Manager
And with the mesh selected use File->Export Selection to create a obj file

Open Mudbox and File->open to load the .obj file
If you decide to go the Mudbox route, you will need to have a clean mesh and uv layout. Otherwise you may need to fix ngons and UV issues.
I have a UV issue after combining the body and head mesh in Maya,

and I'll use UVs & Maps->Create UVs to fix the missing UVs, with the Create Missing UVs Only option

Sculpting Textures
Initially your geometry will come in at Level 0 with the same number of faces you had in Maya

But you can add additional levels (similar to smoothing in Maya) which increases the polygon count of the mesh. Higher poly counts gives your a higher resolution for creating textures. To create a new level hit shift-D

You can continue to create new levels by continuing to hit shift -D

You can navigate up and down levels by using the page up and page down keys.
If you've gone crazy creating too many levels you can delete the highest level with the Mesh->Delete Highest Level command.
Once we have suffient detail we can sculpt detail with the mesh tools.
The Sculpt Tools tab is in the lower left side of the screen. For this case we will just use the Sculpt and Smooth Tool. We can set the size and strength of the brush in the brush options window, or we can interactively control these by moving the mouse with the LMB and the B key held down. The strength can be controled similarly with the mouse and the M key.

We can invert the operation by checking the "Invert Function" box or by holding down the Control key.

The mirror function allows our strokes to mirrors across the selected axis.
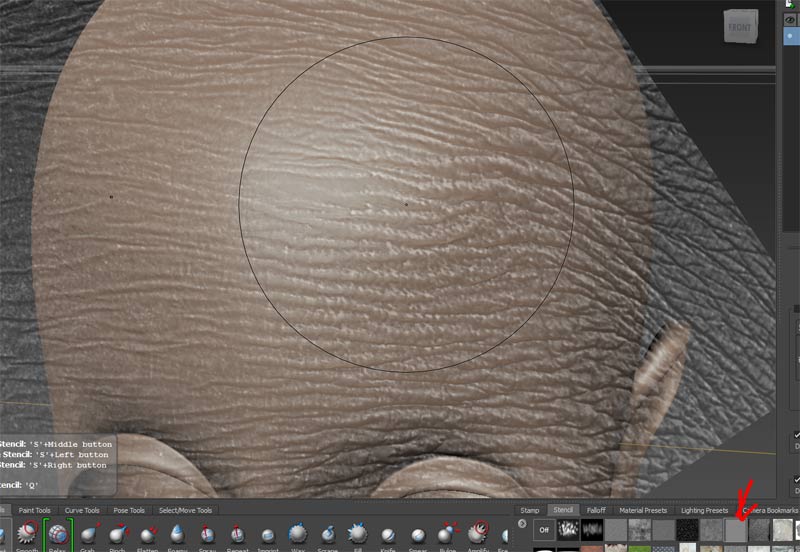
We can use stencils to press patterns into the mesh. Go to the Stencil tab and select a stencil.

We can hold down the S key to position/rotate/scale the stencil into position.
Brush the Sculpt Tool over the stencil. Use the control key to push the pattern into.

use the Smooth Tool too soften the pattern.

We can use the same method with the wrinkle stencil to add wrinkles to the forehead.

And for the upper lip. But we might want to mask off the lip area. To do this go to select face mode, and set mirror X. It will be easier to select a low res set of faces, so page down to level 0 and paint the lips

Page back up to the highest level to see if you covered all of the lip area.
To use the selected faces as a mask, use Edit->Freeze Selected. The blue area will not react to the sculpt brush, and we can stencil sculpt in the upper lip wrinkles without affecting the frozen (masked) area.
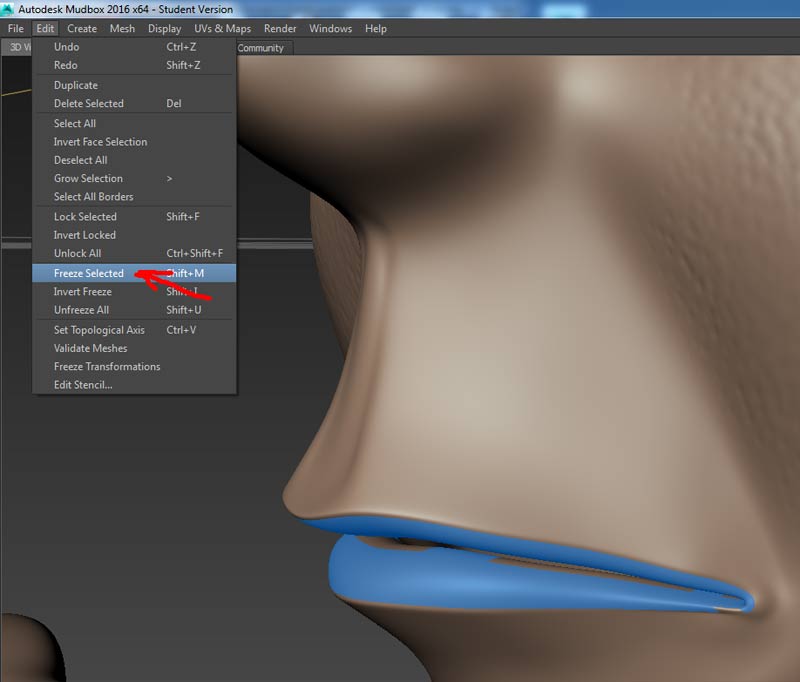

If we want to sculpt a texture to the lips themselves, we can invert the freeze area with Edit->Invert Freeze and now only the lip area can be stencil sculpted


To clear the mask use Edit->Unfreeze All
Painting Textures
To paint a texture you need to add a texture layer. If you try to paint on a mesh without a diffuse layer, Mudbox will prompt you to add one. Otherwise you can use the Add Layer icon in the upper right hand section of the screen. You can add multiple layers and blend between them.

We can use the Paint Tools tab to access the painting operations.
The Paint Brush can be used to paint colors.

The Projection Tool can be used in conjuntion with user loaded stencil images.
To load a stencil, select the Stencil Tab, and click on the small arrow next to the off button. This will open a menu with an option to add Stencil. Select the file to load.
Once your stencil is loaded on the tray, select it.

Go to the Paint Tools tab and select the Projection Tool. Position the stencil and the mesh and use the Projection Tool to paint the surface.
Generating a normal Map
To generate a normal map for Maya, use UVs & Maps->Extract Texture Maps and select New Option
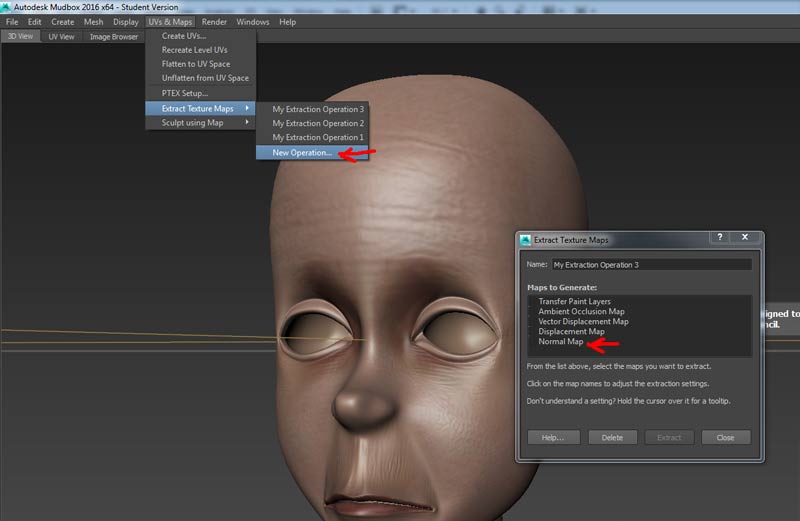
When the Extract Texture Map window opens, select Normal Map and use the options highlighted below

Taking Textures back to Maya