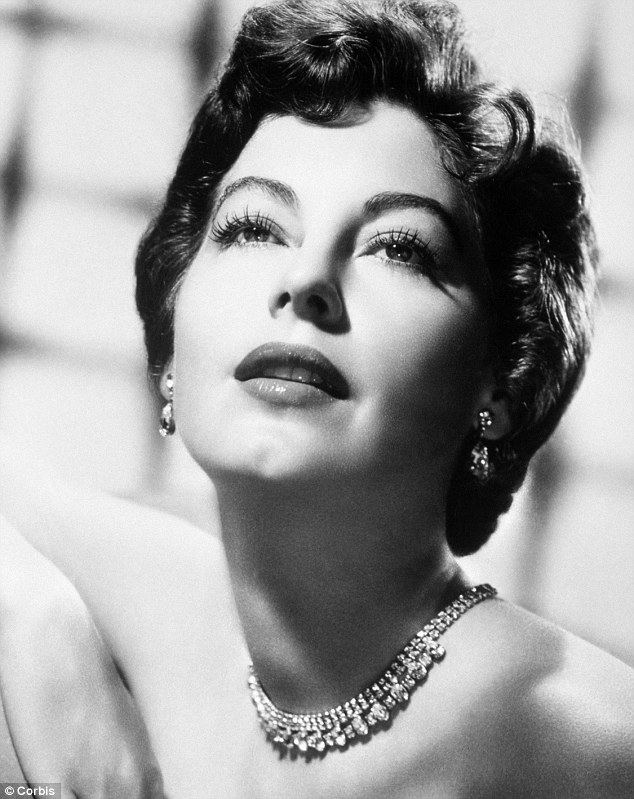
Classic Hollywood lighting scheme, used to both reveal the subject in a flattering manner and convey a sense of form, depth and clarity of the scene to the viewer. The scheme breaks the functions of lights into three groups.
The key light which corresponds to the dominant light source in the environment (e.g. sunlight, lamp, candle, etc).

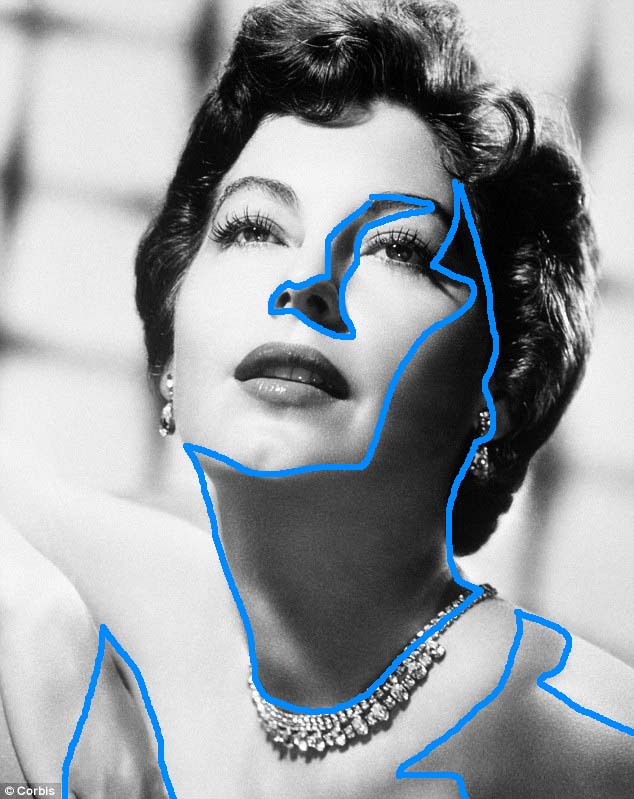
The fill light or lights which generally corresponds to the reflected lights in the environment (e.g. light from a lamp reflected from walls, floor, furniture). Lower in intensity than the key light, the fill lights insure that areas unlit by key light still communicate the shape of the object to the viewer. In the example below, we understand the shape of the neck not from the key light, but from the presence of the lower intensity fill lights.
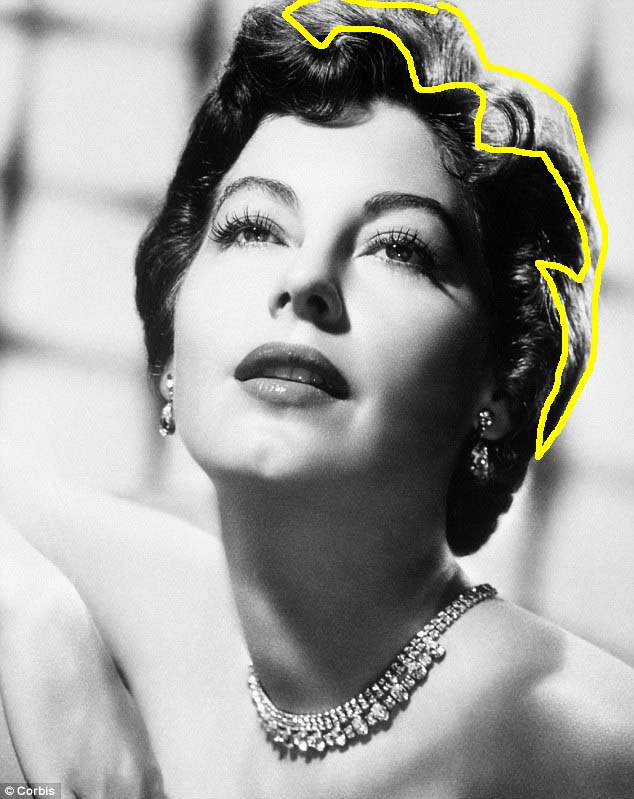
The rim or back light which is positioned to illuminate the outer edge of the subject. The rim light is not intended to mimic the functionality of a real world lighting, but to provide separation between the subject and the background scene.
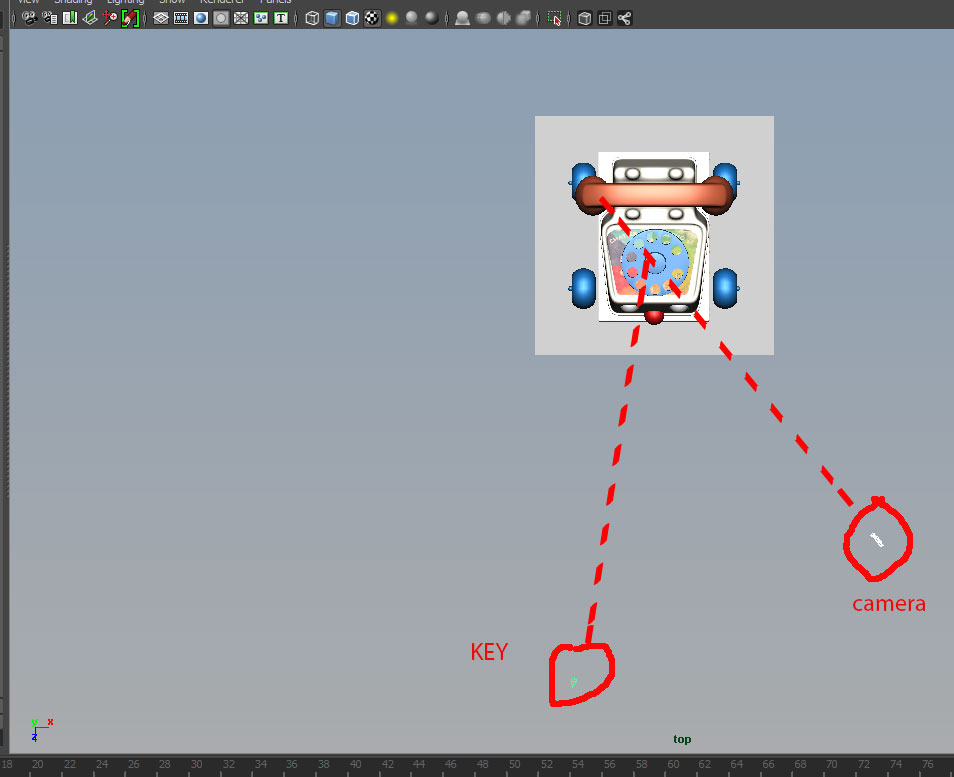
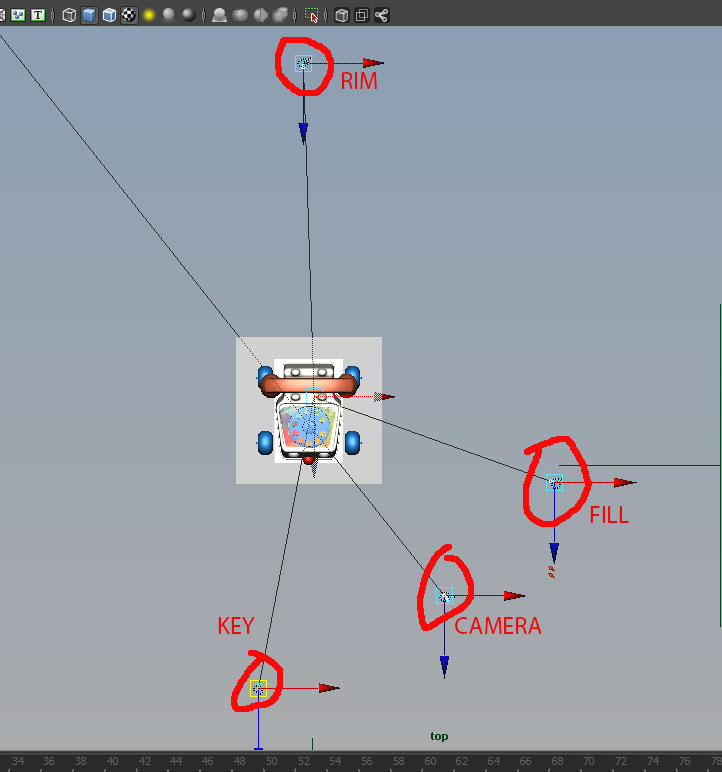
Generally, we can start with a rough estimate on where these lights should go. If we think of the example above, the key light is roughly 45 to 60 degrees off of the axis between the camera and the subject. The fill light or lights will also be roughly 45 to 60 degrees off that axis, but on the other side of the camera. The rim light is somewhat behind the subject relative to the camera.
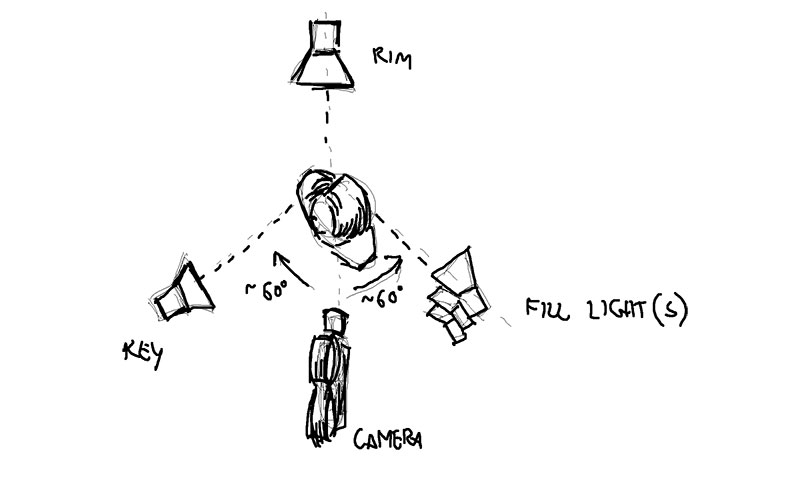
The key light should be above the camera and angled down toward the subject. The fill lights can be distributed from anywhere above to below the camera/subject horizontal plane. The rim light should be positioned to catch and light the edge of the subject and provides separation from the background.
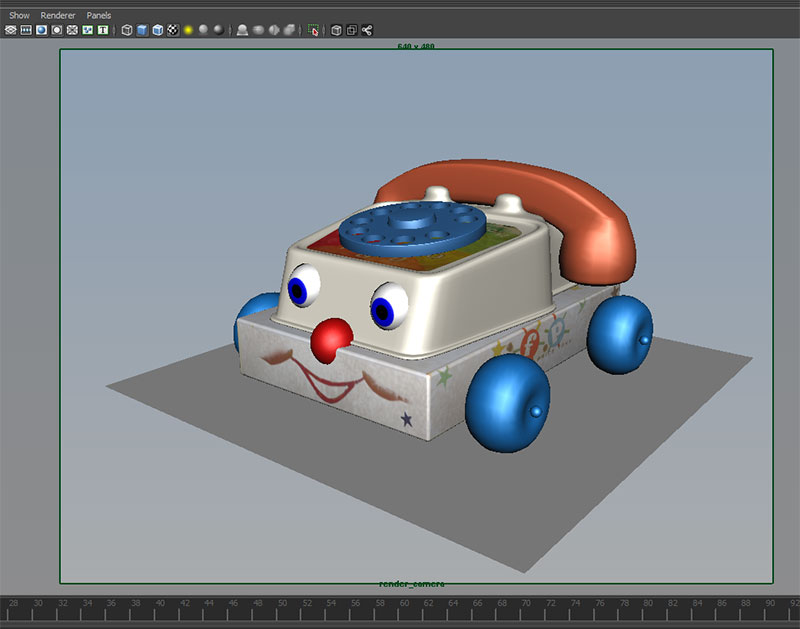
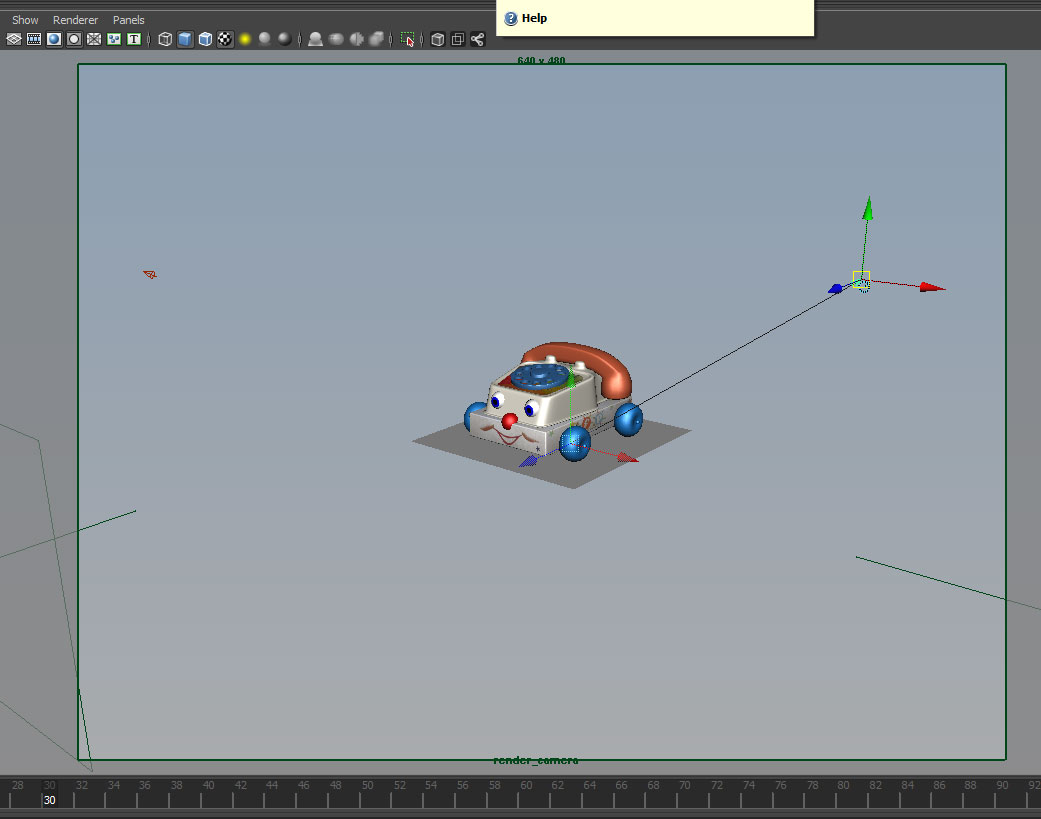
Let's bring up the toy phone example again from Y:/Courses/2014/2015/AC5001_Conroy_SP_2015/examples/week_12/lighting_start.ma. Position the subject relative to the camera.
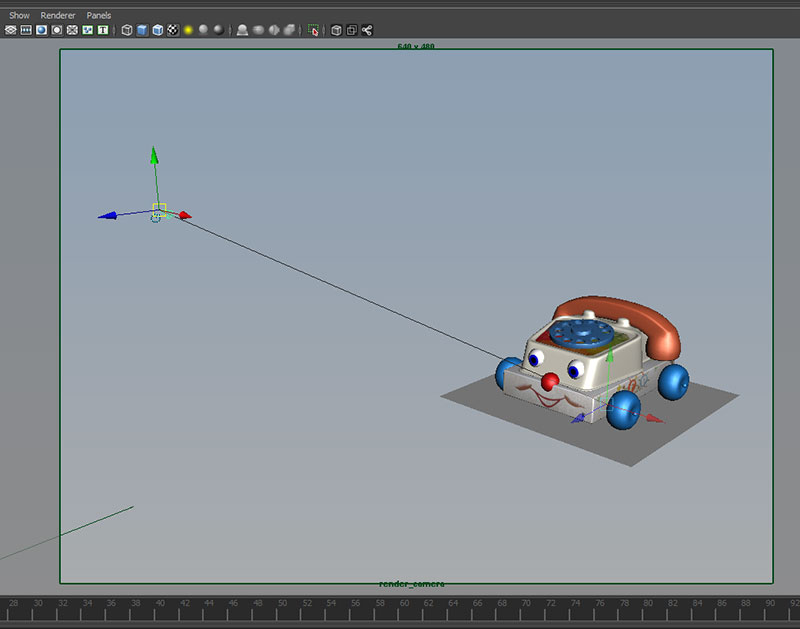
Using the "t" hot key or "look through selected" aim the light, position it roughly 45 to 60 degrees from the camera and pointing down at the subject:
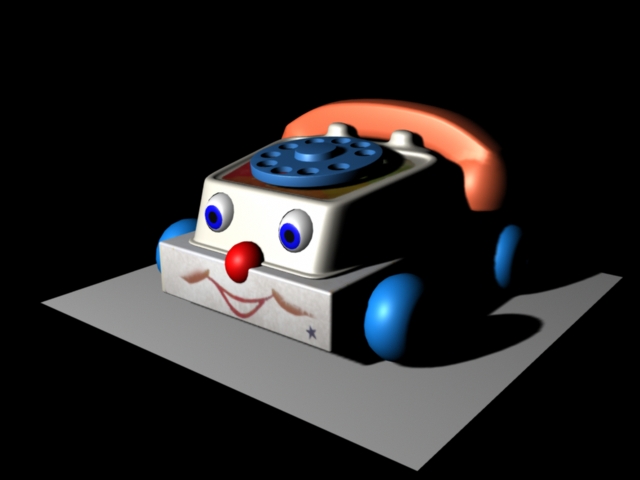
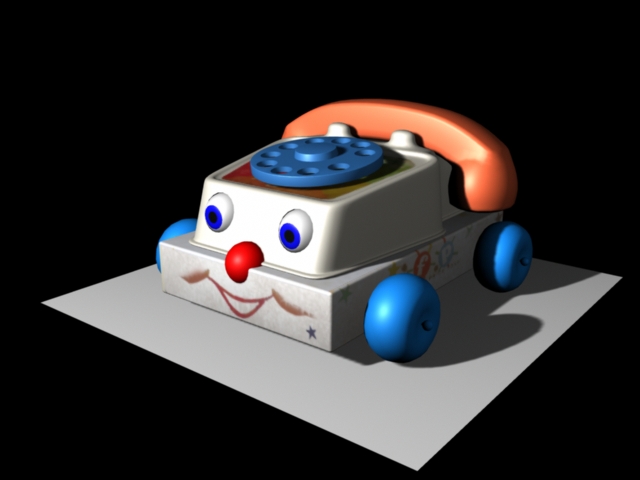
The key light casts the dominant shadow. Turn on Depth Map shadows for the key light and render. Reposition the light until you achieve an appealing lighting and shadow placement.
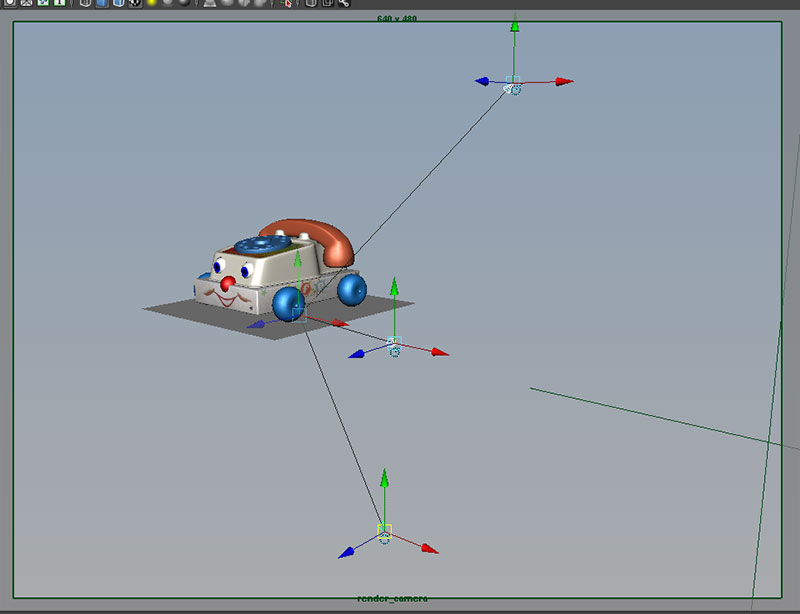
Next, add a fill light to provide some light to the unlit areas of the scene. Position this on the opposite side of the camera/subject axis. Reduce the cumulative total intensities of all fill lights to be about 40% of your key light intensity. Do you turn on depth map shadows for the fill lights.

Re-render and check illumination
Another method is to provide a more distributed fill lighting, by replacing one light with several. Each fill light lights the subject from a different angle. This better emulates the behavior of bounced lights. Since we need the cumulative lighting of the fills to be a fraction of the intensity of the key light, we use three fill lights, each with an intensity of 0.17
Generally we would only want one shadow casting light in our scene, but we can provide a sense of the soft gradient shadows that accumulate in corners (i.e. ambient occlusion) by adding low resolution/high filter depth map shadows to our fill lights. Turn on depth map shadows on each fill light, with a resolution of 32 and a filter value of 4.
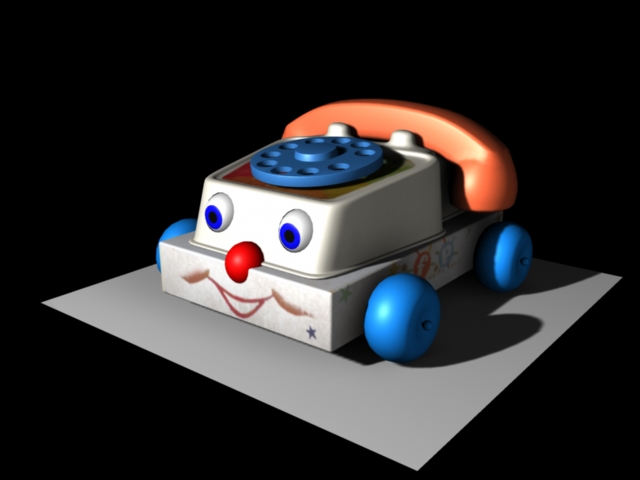
Without fill shadows:
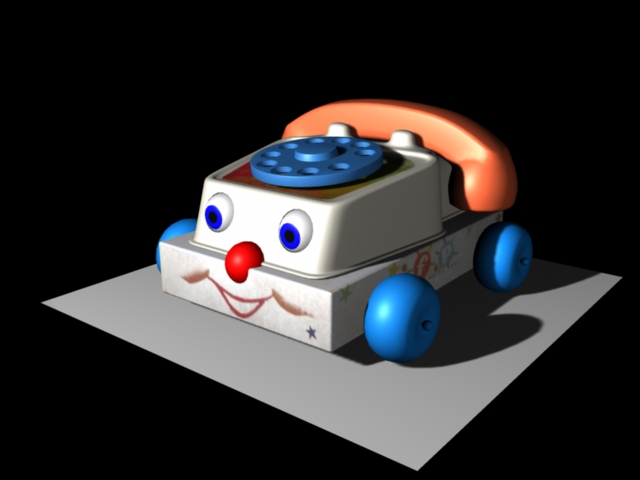
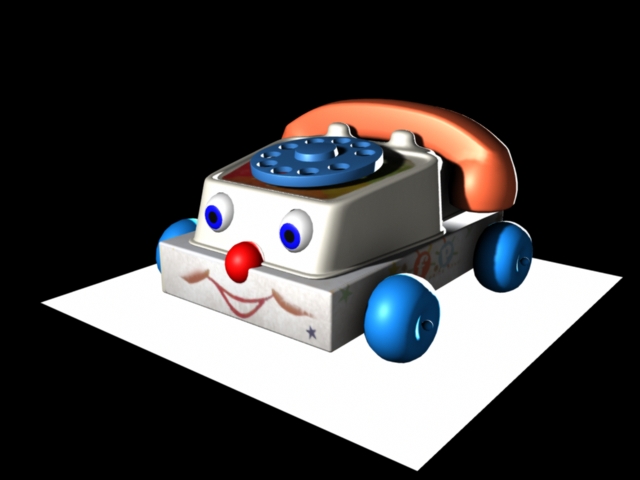
With fill shadows. Notice the different behind the side of the toy and the wheels or near the receiver.
In the current lighting scheme, the back of the receiver and rear wheels each blends into the background. A rim light will help provide a little separation between the subject and the environment.
Prosition the rim light to catch the edge of the receiver and rear wheels. Set it's intensity to 30 to provide a nice white edge.
We can use light linking to remove the some objects from being illuminated by the rim light. Use Window->Relationship Editors->Light LInking->Light Centric. Select rim light on the left and deselect all objects except for the recevier, and the two back wheels.
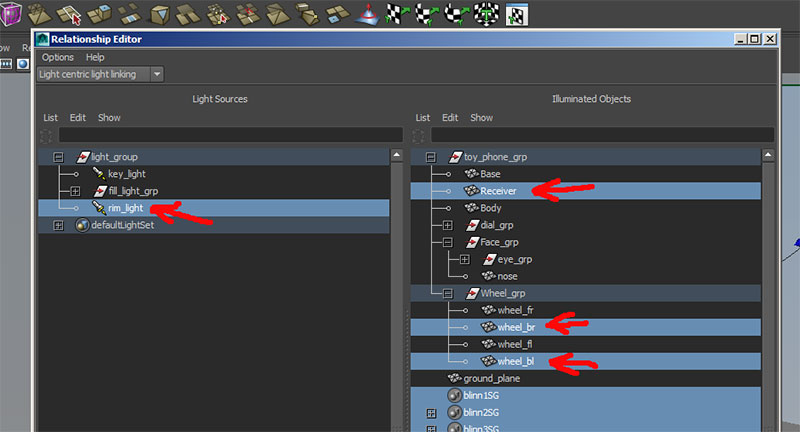
And test render to see the results
