
This is a brief overview of my attempt to date to design interesting cartoon faces using interactive evolution. Simple cartoon faces provide a wide range of expressive and associative potential from very simple shapes, and very few parameters. They have been an ideal test case for investigating interactive evolutionary design system construction.
( 4.6 meg Quicktime showing nine continuous paths through this "Face Space")
Recently, I've been implementing a generic interactive evolutionary design environment within Side Effects Software's 3D package, Houdini. This quick intro is mostly to allow those who are familiar with Houdini to look over my methods, nets, and scripts, and hopefully give me some suggestions for improvements. This should also give the rest of you an overview of what I've been working on for the last couple weeks. A more general paper on interactive evolutionary design systems and data flow network interfaces is in the works.
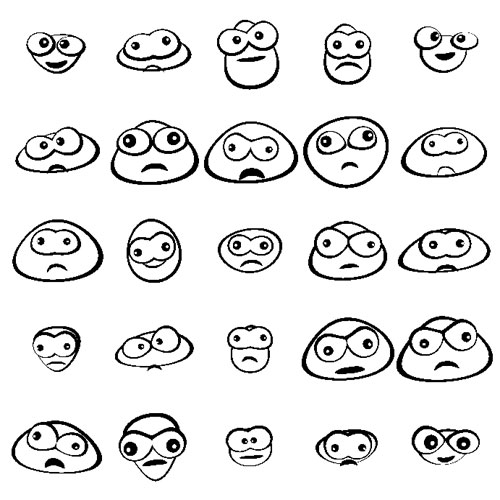
The process begins with an initial population of arbitrary size (as shown in the screenshot above.) Any number of the "best" can then be interactively selected and mated. From the above population, I selected three individuals. They appear as the first three faces in the bottom row of both of the two pictures below. The remaining 22 faces in each picture are their offspring. Each child was created by combining the genes of two of the selected parents. The first picture used single point crossover (parental traits are more evident in offspring) while the second picture used uniform crossover:

Varying degrees of mutation can be performed as well. The bottom left
face is mutated by a relatively low amount in the left picture. The
same lower left face is mutated much more in the picture on the
right:


Breeding with varying degrees of crossover and mutation can continue
until something sufficiently "interesting" is found:
The cartoon face "Prototype" is an object which makes reference to any
number of "genes" (stored in CHOP channels) which are expected to hold
[0..1] parameter values. This particular prototype just uses a stack
of eleven black and white circles, which are individually subjected to
various affine transformations and twist SOPs:

Each individual copy of the prototype contains expressions which
reference the gene values stored in the CHOPs. Each object determines
which CHOP channel it should obtain its gene values from based on the
object's number. After getting the value, it typically fits it
into an appropriate range. For example, the Bend Strength in the
above eye_twist Twist SOP is:
fit(chopci("/ch/evolve/genotypes",opdigits(".."),10,),0,1,-20,20)
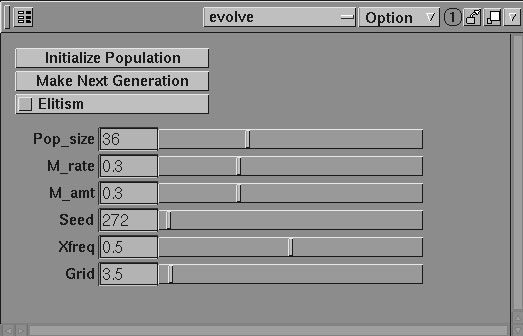
A custom panel is used to control evolution parameters such as
population size, mutation and crossover, etc.:
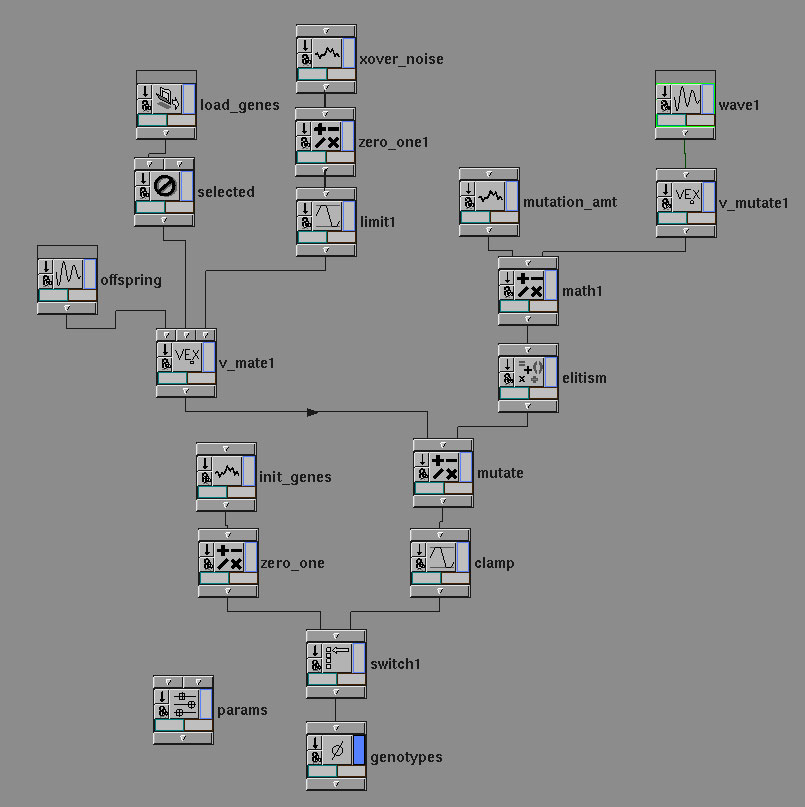
A CHOP network generates the initial gene values, as well as the
genes of the subsequent generations:
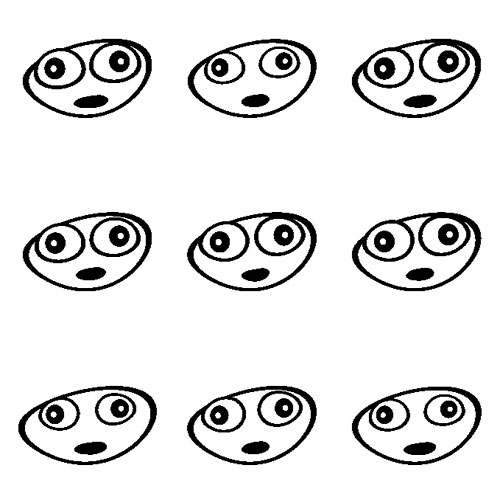
Initially, a channel of random genes is generated for each individual
in the population (population of nine shown below). 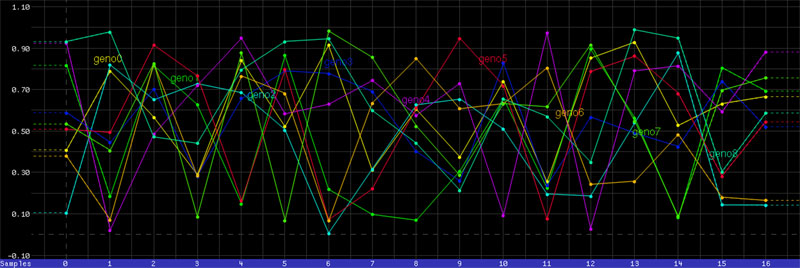
When the Make Next Generation button in the custom panel is
pressed, a script is called which
stores the current generation's genes in a clip file, which is then also
read into the "load_genes" CHOP at the top of the CHOP network. The
user's selection is noted by the script, and the "selected" CHOP
filters out the non-chosen gene channels.
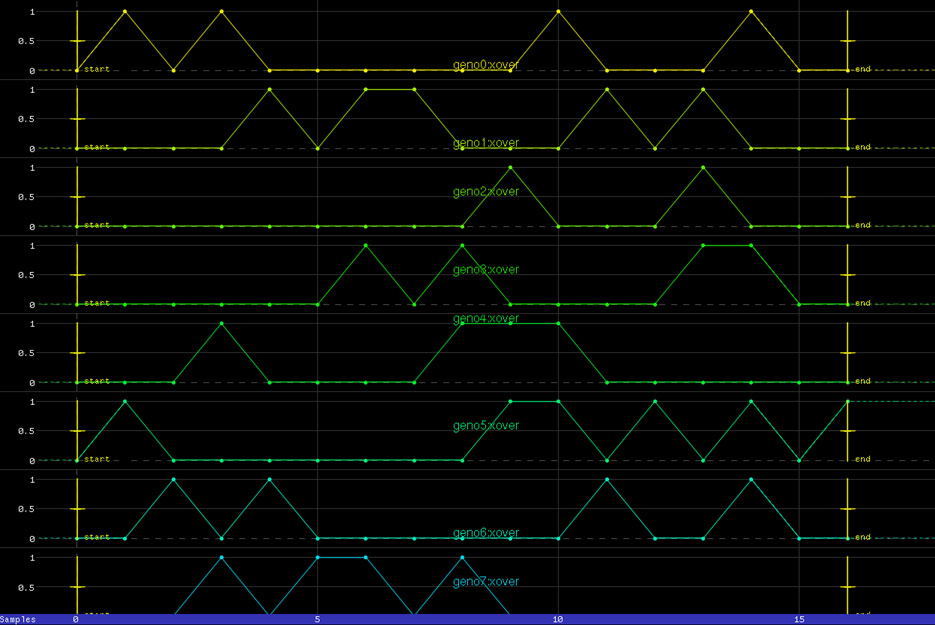
For each offspring to be generated, a series of chops determines where the crossovers will occur between the chromosomes of the offspring's parents. The crossover gene locations correspond to the values that are set to "one" in these graphs:
The crossovers are then generated with a custom Pulse Toggle VEX CHOP. Given the above
channels, the VEX CHOP produces this:

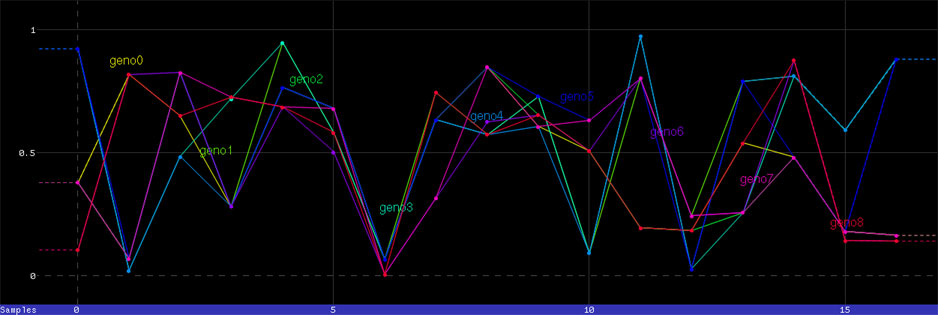
The above crossover channels, the selected parent channels, and dummy
offspring channels are then all passed into a custom Mate VEX CHOP which chooses pairs of parents from
the selected objects, uses the crossover info to mix their genes, and
copies the genes into one of the offspring gene channels. The CHOP's
output is the base offspring genotypes:
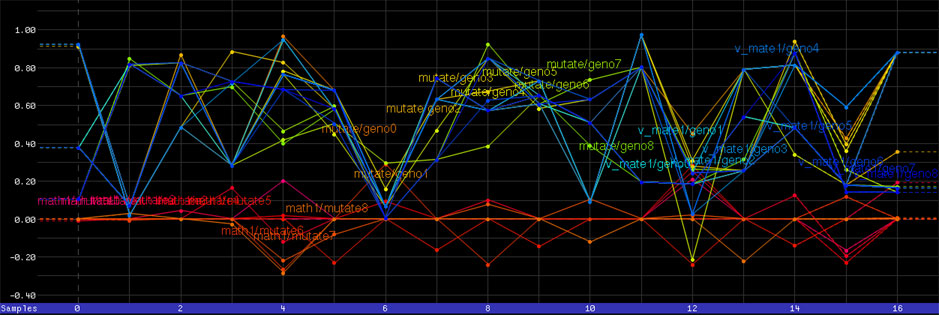
When the Make Next Generation button is pressed, the script
which runs also determines (based on a custom panel parameter) how
many of the offspring genes should be mutated, and how much. A series
of chops generates a channel for each offspring determining which
genes are to be mutated. The mutation chops set a number of samples
to "one", while the rest of the samples remain at zero. A noise CHOP
is used to generate a channel of random noise for every gene of every
object. The noise channels are multiplied by the mutation channels
before being added to the object's genes, so most of the noise values
become zero. Several of the offspring's pre-mutation gene values are
shown below in blue. The mutation values are shown in red, and the
mutated offspring in yellow:
Scripts, etc: