Now you can record your own direct measurement videos and analyze them with p5.js.
Note: The STEMcoding Object Tracker works best in chrome and edge!
It can work in other browsers (safari, firefox, etc.) but it may run slower or not at all due to some memory problems.
We are really excited about this new capability because there are few other ways of using chromebooks to do object tracking.
There are already a couple of programs out there that people use to track objects in videos. The STEMcoding Object Tracker has some important differences from these programs.
These programs use very sophisitcated algorithms to scan the entire frame looking for things that look like the object it is trying to track. The STEMcoding object tracker isNOTsmart enough to know what the object looks like. The STEMcoding Object TrackerONLYknows what color the object is and what color the background is.
Computers work with color by assigning three numbers to each color. The first number is how much red there is in the color, the second is how much green, the third is how much blue. These three numbers are on a scale from 0 to 255. This is sometimes called an RGB (red, green, blue) color. Pure red is (255,0,0). Pure green is (0,255,0). Pure blue is (0,0,255). Pure white is (255,255,255) and pure black is (0,0,0).
Here is a link to a color picker where you can see what colors correspond to different RGB values.
Click "Edit" to view the code (you do not need to download the files). Click "Run code".
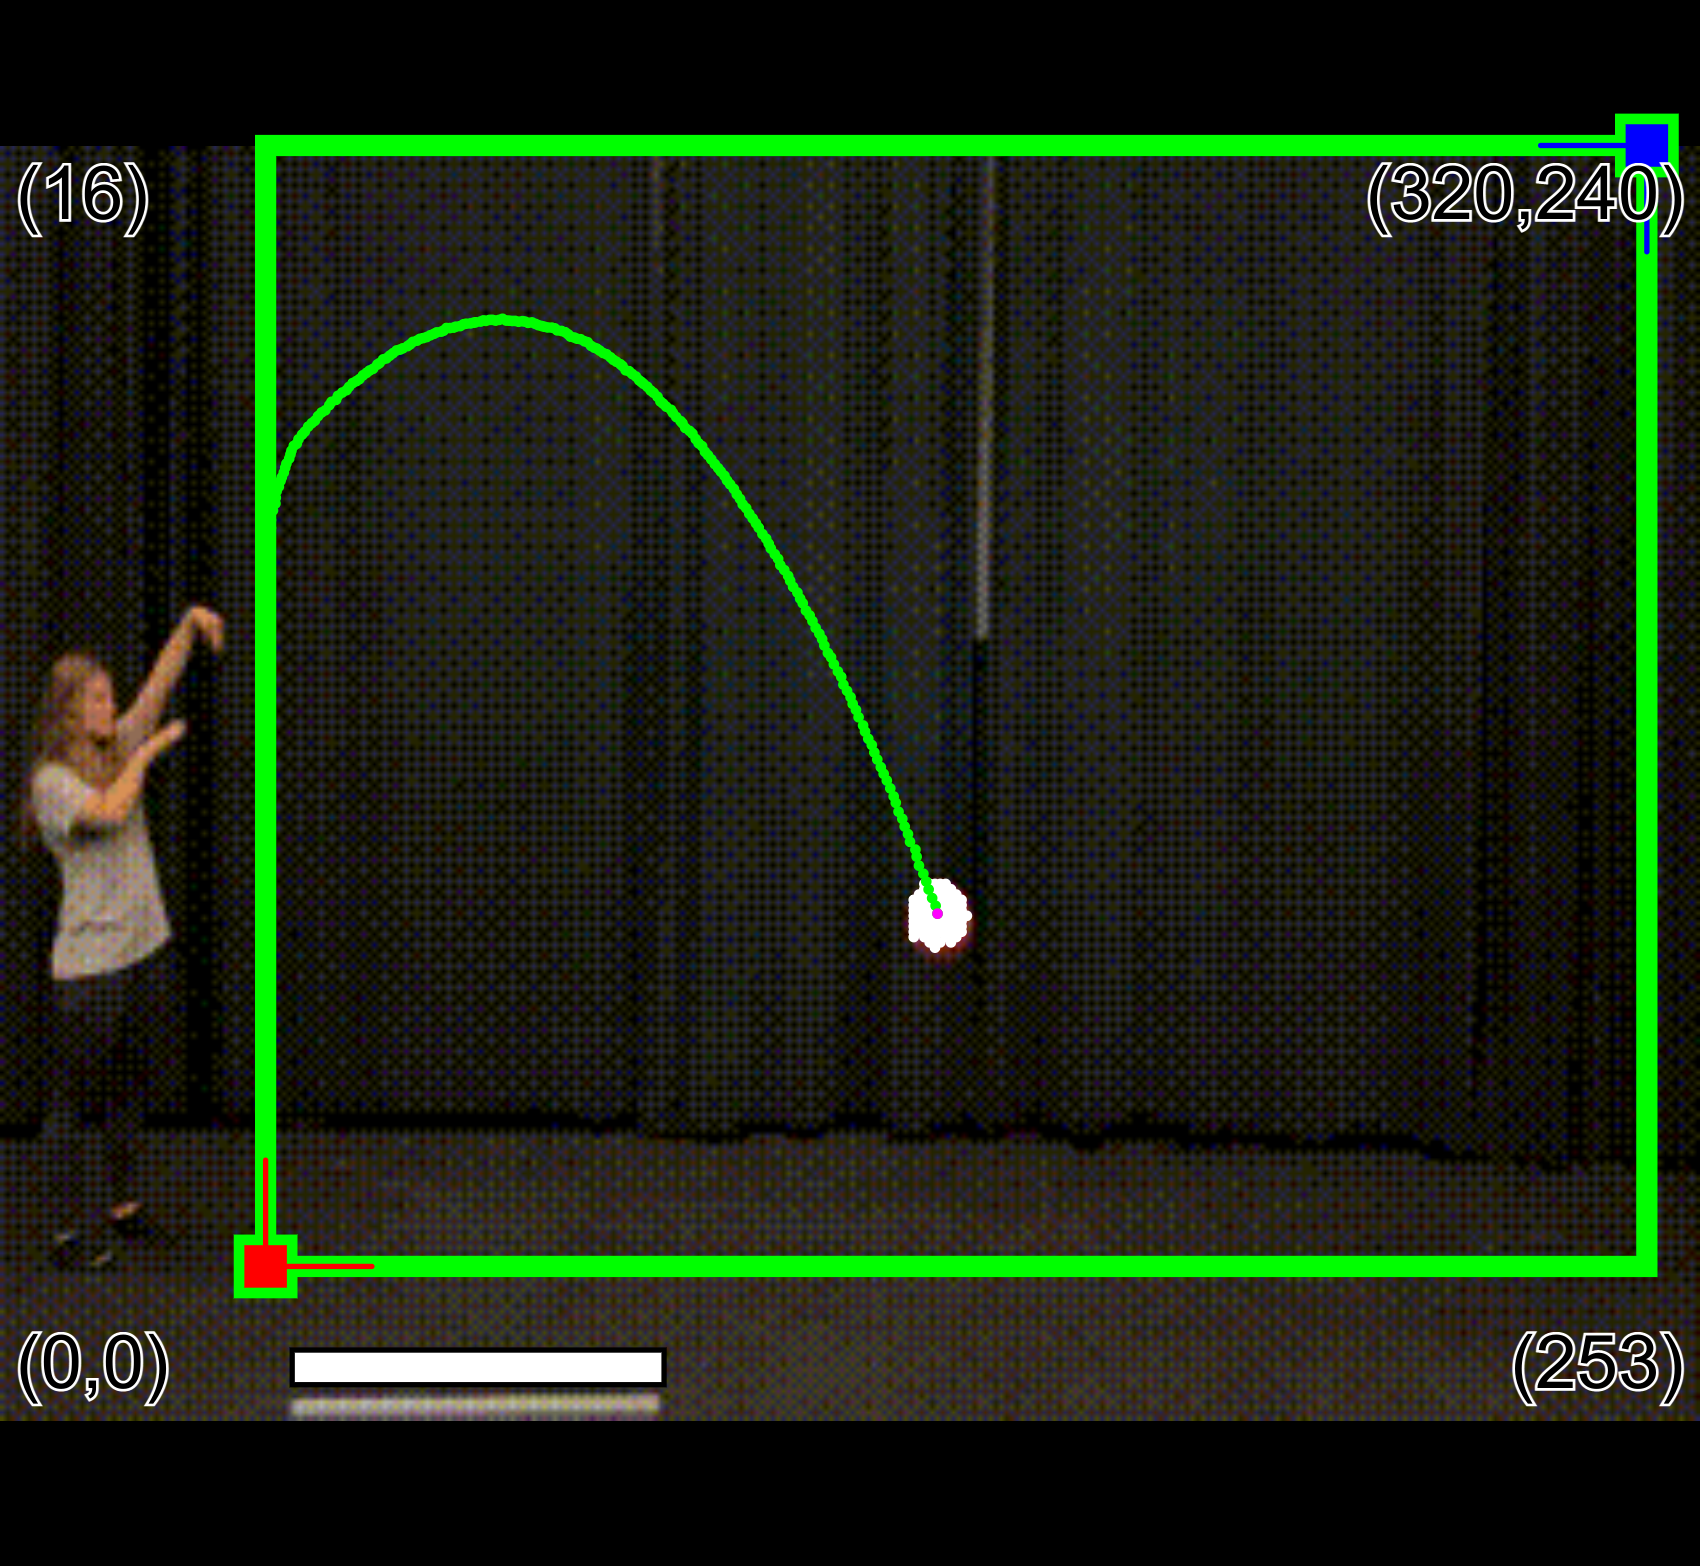
The big green rectangle defines the area in which you would like to track the object. You want to exclude from this area anything that is not the plain background and the object you are tracking. In this case, the student throwing the basketball and the ruler at the bottom should be outside the green rectangle because they are not the object we want to track. Move your cursor to the location you wish to place the lower left corner of the rectangle, then press "w" on your keyboard to set it. Do the same for the upper right corner of the rectangle, pressing "e" to set it.
The small white rectangle (at the bottom of the screen) defines the meterstick/ruler. Line up this rectangle with the ruler in the video. Move your cursor to the location you wish to place the left edge of the rectangle, then press "r" on your keyboard to set it. Do the same for the right edge of the rectangle, pressing "t" to set it.
Pressing the "Info" button in the top left corner of the screen displays these instructions.

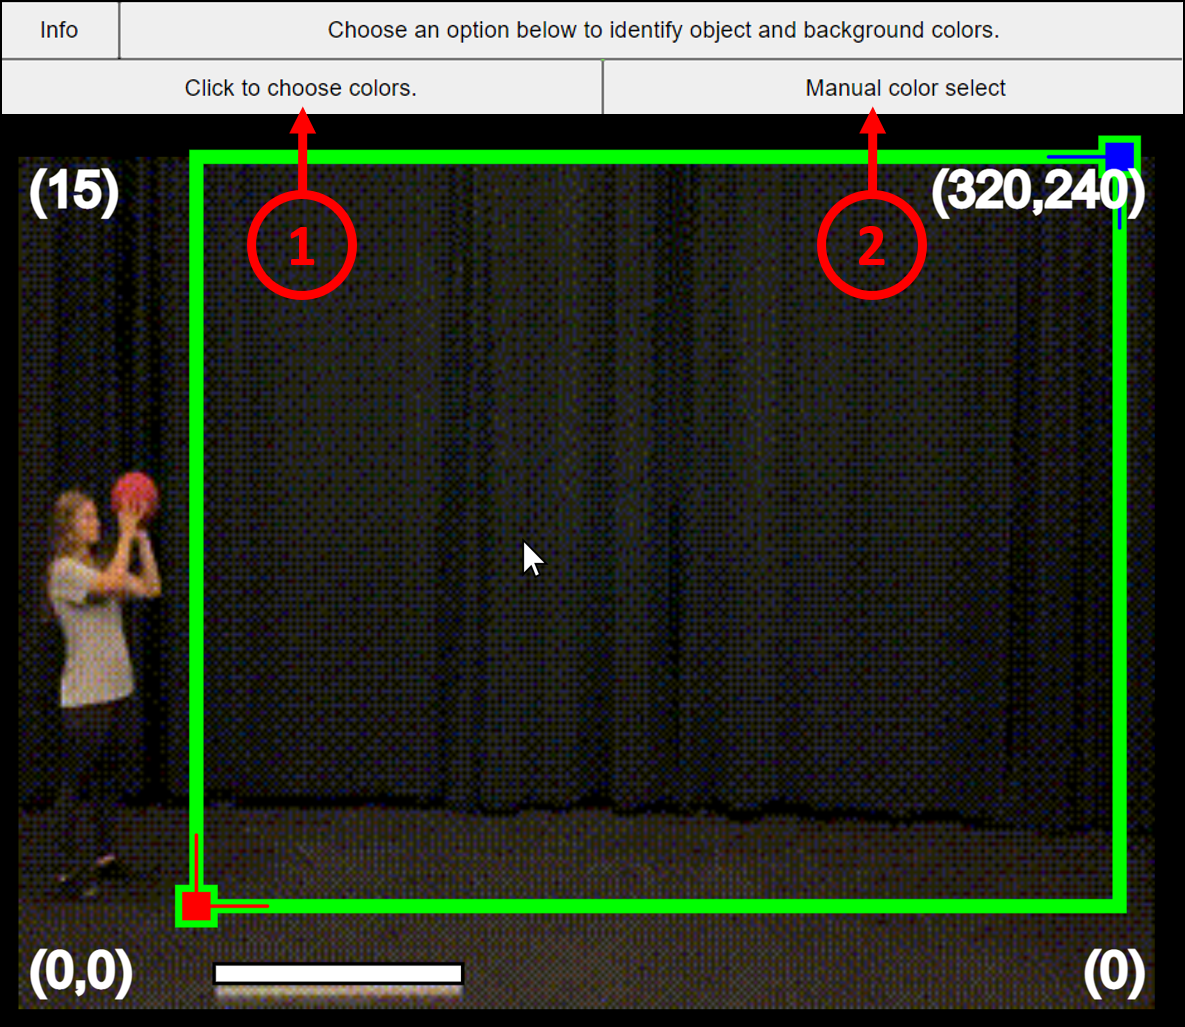
There are two different ways to select the object color and the background color. You can either use the clicking method (1), which allows you to choose the colors of the object and background by clicking on them, or you can use the manual selection method (2), which allows you to choose the colors by specifying their RGB values or by moving a slider to match the color.
You should try using both methods to determine the object color and background color. Some videos work better with one option than the other.
For the "Click to choose colors" method:
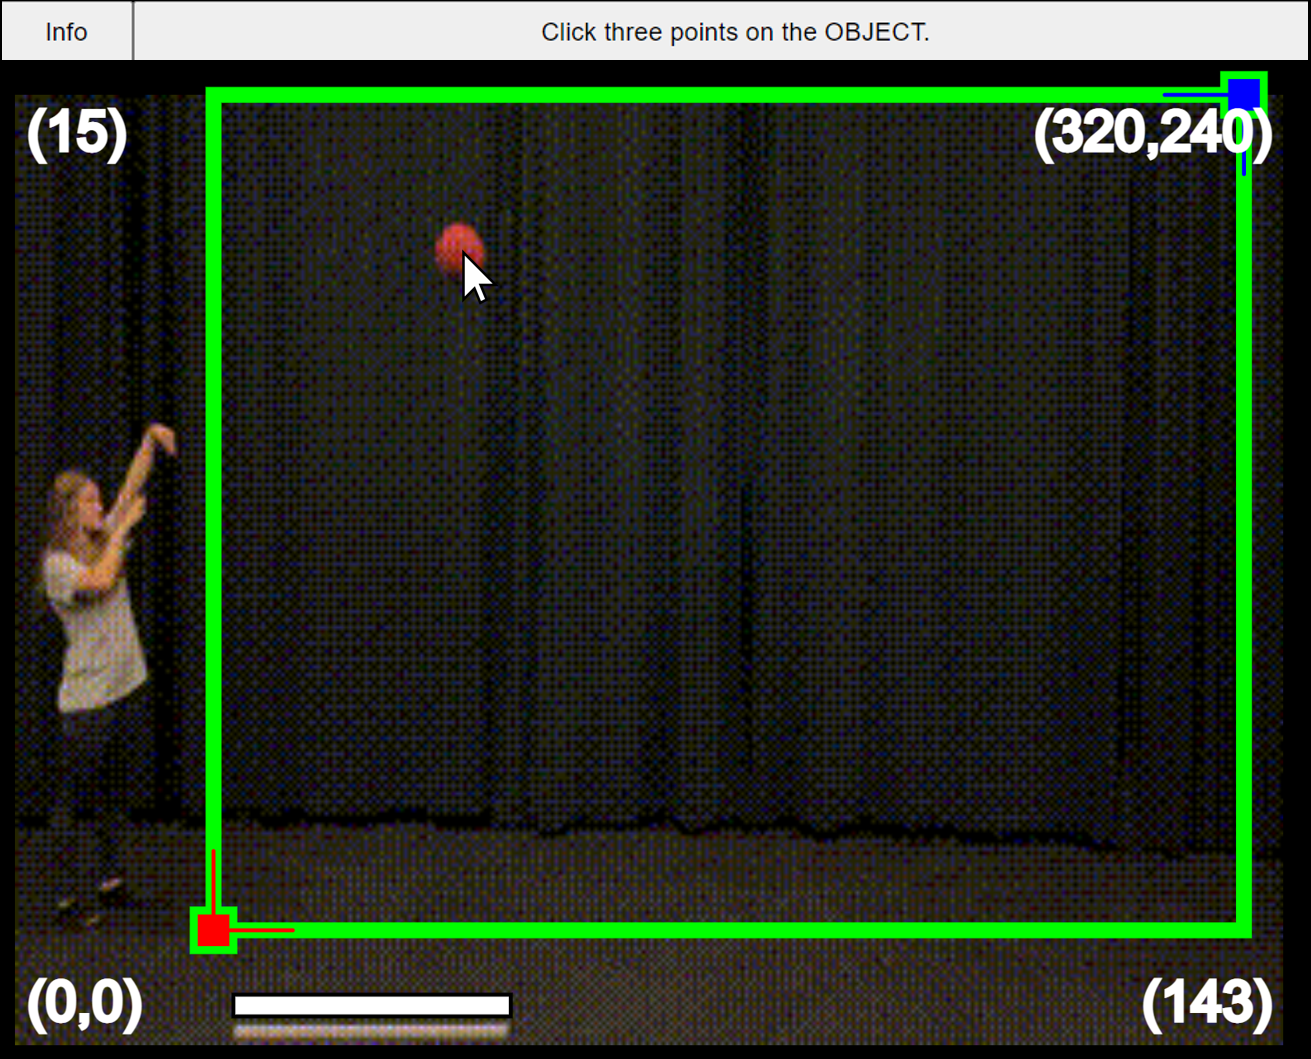
You will see this screen instructing you to click 3 different points on the object. This will grab the RGB values of the 3 pixels you click on and use those colors to identify the object.
After you click 3 times, you'll be prompted to do the same thing to get the background color. Click 3 points on the background to set the background color.
For "Manual color selection" method:
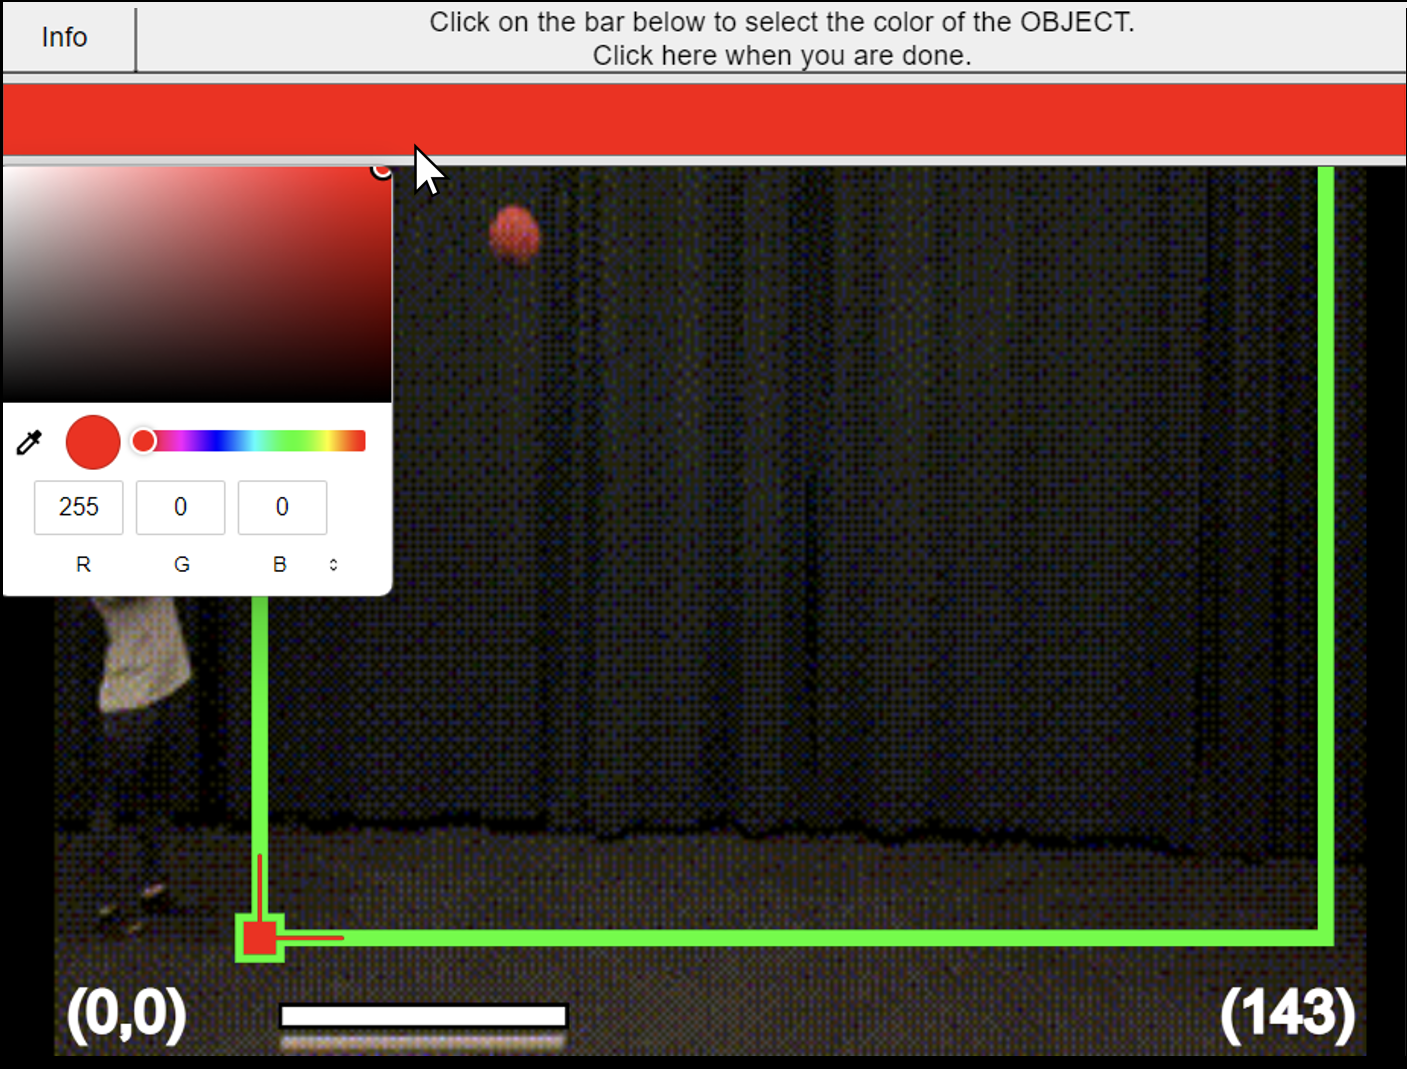
You will see this screen instructing you to click on the color bar to select the object color. This will pull up a color picker tool like the one shown below. You can use the slider to find the right color for your object, or you can type in a specific RGB value at the bottom. Once you've selected the color, click the top bar to continue.
Note: The color picker tool may appear slightly different depending on which browser and OS you are using.
Then you will be prompted to do the same thing for the background. Use the color picker tool to select the background color and click the top bar to continue.
After selecting colors using either method,you will see this screen asking if the object is correctly highlighted in white. Only the object should be highlighted in white, not any part of the background. If the object is not highlighted correctly, you should try reselecting the colors (try both methods). If the object is still incorrectly highlighted after reselecting colors, Step 4 might fix the issue.

Optional: Specify the object and background colors in sketch.js. If you run the code again these colors will come up as default for "Manual color select" mode
objectColor = [ 255, 0, 0 ]; // red
backgroundColor = [0, 0, 0]; // black
Once the colors of the object and the background have been selected, the program has two different ways it can track objects and it is up to you to decide which "mode" to use. Your choice determines the method by which the program identifies which pixels are a part of the object.
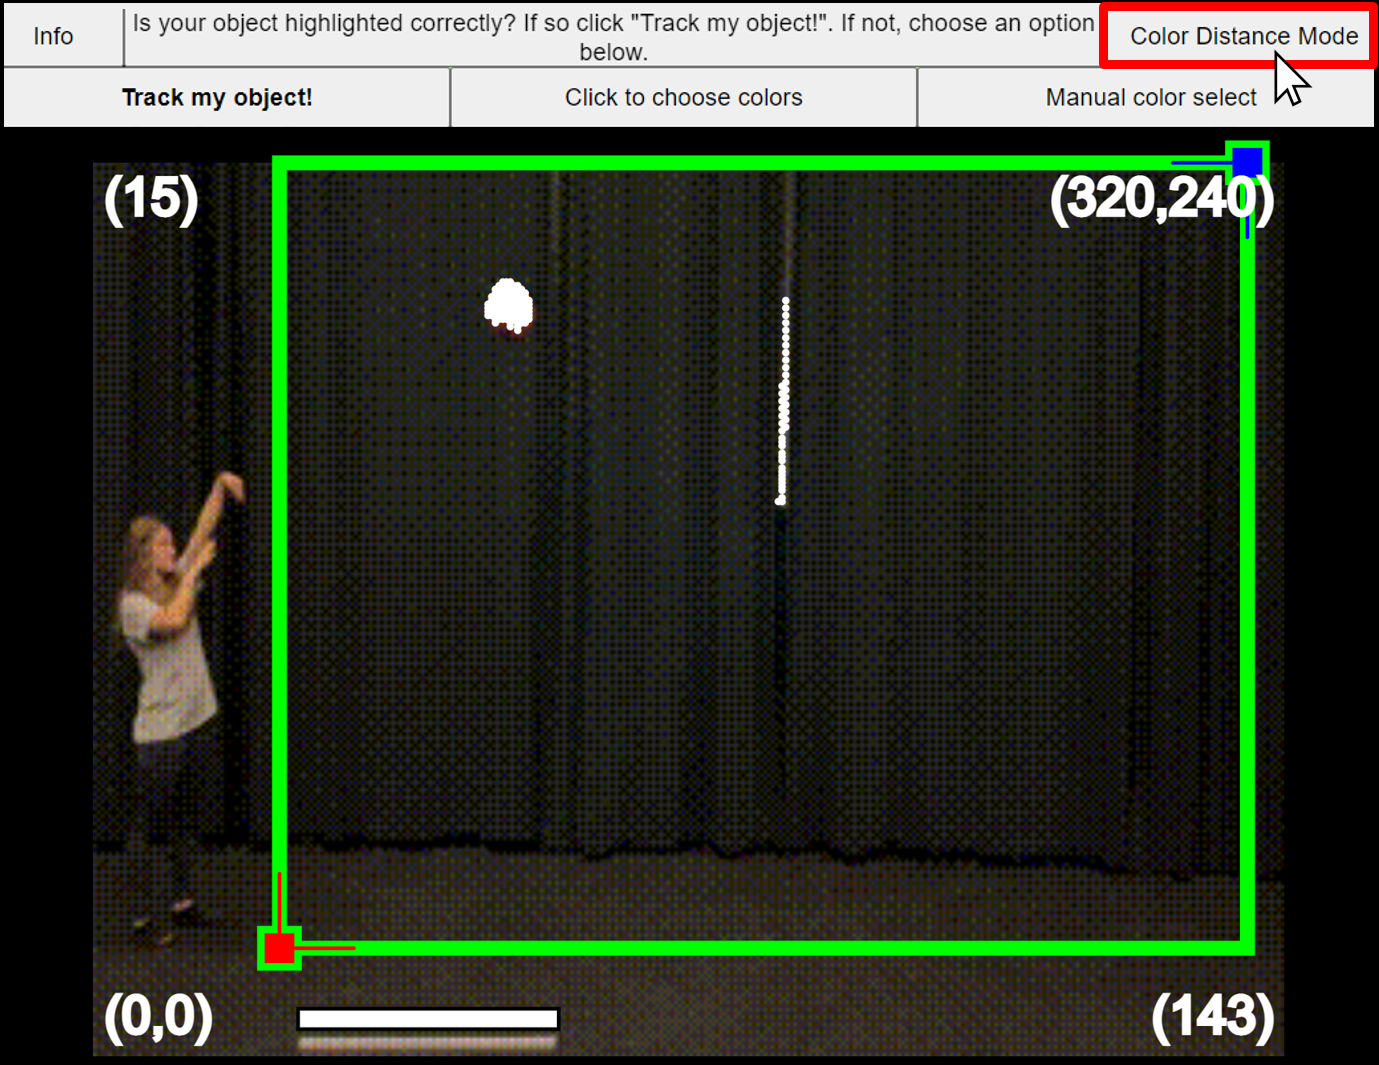
The program automatically flags as white the pixels in the video that it thinks are part of the object. You can slide the slider at the bottom to change the frame that is being examined to see if the program does a good job of finding the object in the beginning, middle, and end of the video. In the program you will see there is a little button in the top right that you can use to switch from color distance mode to brightness agnostic mode. You should try out both modes to see which one works better for your video!

Color distance modetreats the object color and background color like x,y,z coordinates. For instance, the color black has an RGB value of (0,0,0) and would be interpreted by the computer as the point (0,0,0) in the x,y,z coordinate system. If the color of a particular pixel (which is like another x,y,z coordinate) in the video is closer to the object color than the background color then the pixel is flagged as being part of the object. But if the color of the pixel is closer to the background color, that pixel will not be flagged as part of the object.
Brightness agnostic mode is more complicated than color distance mode. It was developed because when you use a dark background, the object tracker can get confused into thinking that anything that is not dark is the object, even if the colors do not look like the colors of the object. For example, if there is a little bit of gray on your dark background, it might be confused for the object if you are using color distance mode. Brightness agnostic mode is designed to ignore how bright a pixel is and focus instead on what color the pixel is. This often works well unless the lighting is dim in which case maybe the brightness of the pixel is really important to figure out whether it is object or background.
Here is an example of when brightness agnostic mode might be useful. In the image below, the object tracker is in color distance mode and is incorrectly flagging a grey area in the background as part of the object. Color distance mode is sensitive to brightness, and cannot differentiate between the light colored object and the light grey area in the background.
Clicking the button in the top right corner changes over to brightness agnostic mode, and the line of highlighted pixels disappears. Brightness agnostic mode can differentiate between the red object and the black background without getting confused by brighter/darker areas of each. Now the object is highlighted correctly!

After some tinkering, the program should be able to highlight the tracked object with white pixels. Only the object should be highlighted, not the background. If you can get to this point click the Track my object! button and the program will go through each frame of the video and find all the pixels that have the right color to be the object.
When the program gets to the end of the video it will save a csv file that you can open in Google Sheets or Excel. You will use this in Part 2: Analyze Height vs. Time.