Processing Human Performance: Blade 1.7
NOTE: realtime solving setup and postprocessing in Blade 2 is limited to the Mocap Lab computers. It is optimized compared to the process below and is available for those interested to work with the mocap system after the completion of the current course.
The general logic of human performance processing is similar to that of props. First the subject is calibrated based on the performed short Range Of Motion (ROM). A human VST is customized in the process of calibration to fit the proportions of the specific performer. Then the customized template (VSK) is used to process the performance take with as much automation as possible. Please follow instructions below and/or Blade 1.7 Step-by-Step Reference Guide pdf p.16 "Character Setup" in class folder Blade Documents.
As you go and when finished SAVE YOUR WORK AS HDF file. Main button/Save as...
At the end of cleaning and solving EXPORT FBX file. Main button/Export FBX. Leave data at default fps (capture rate).
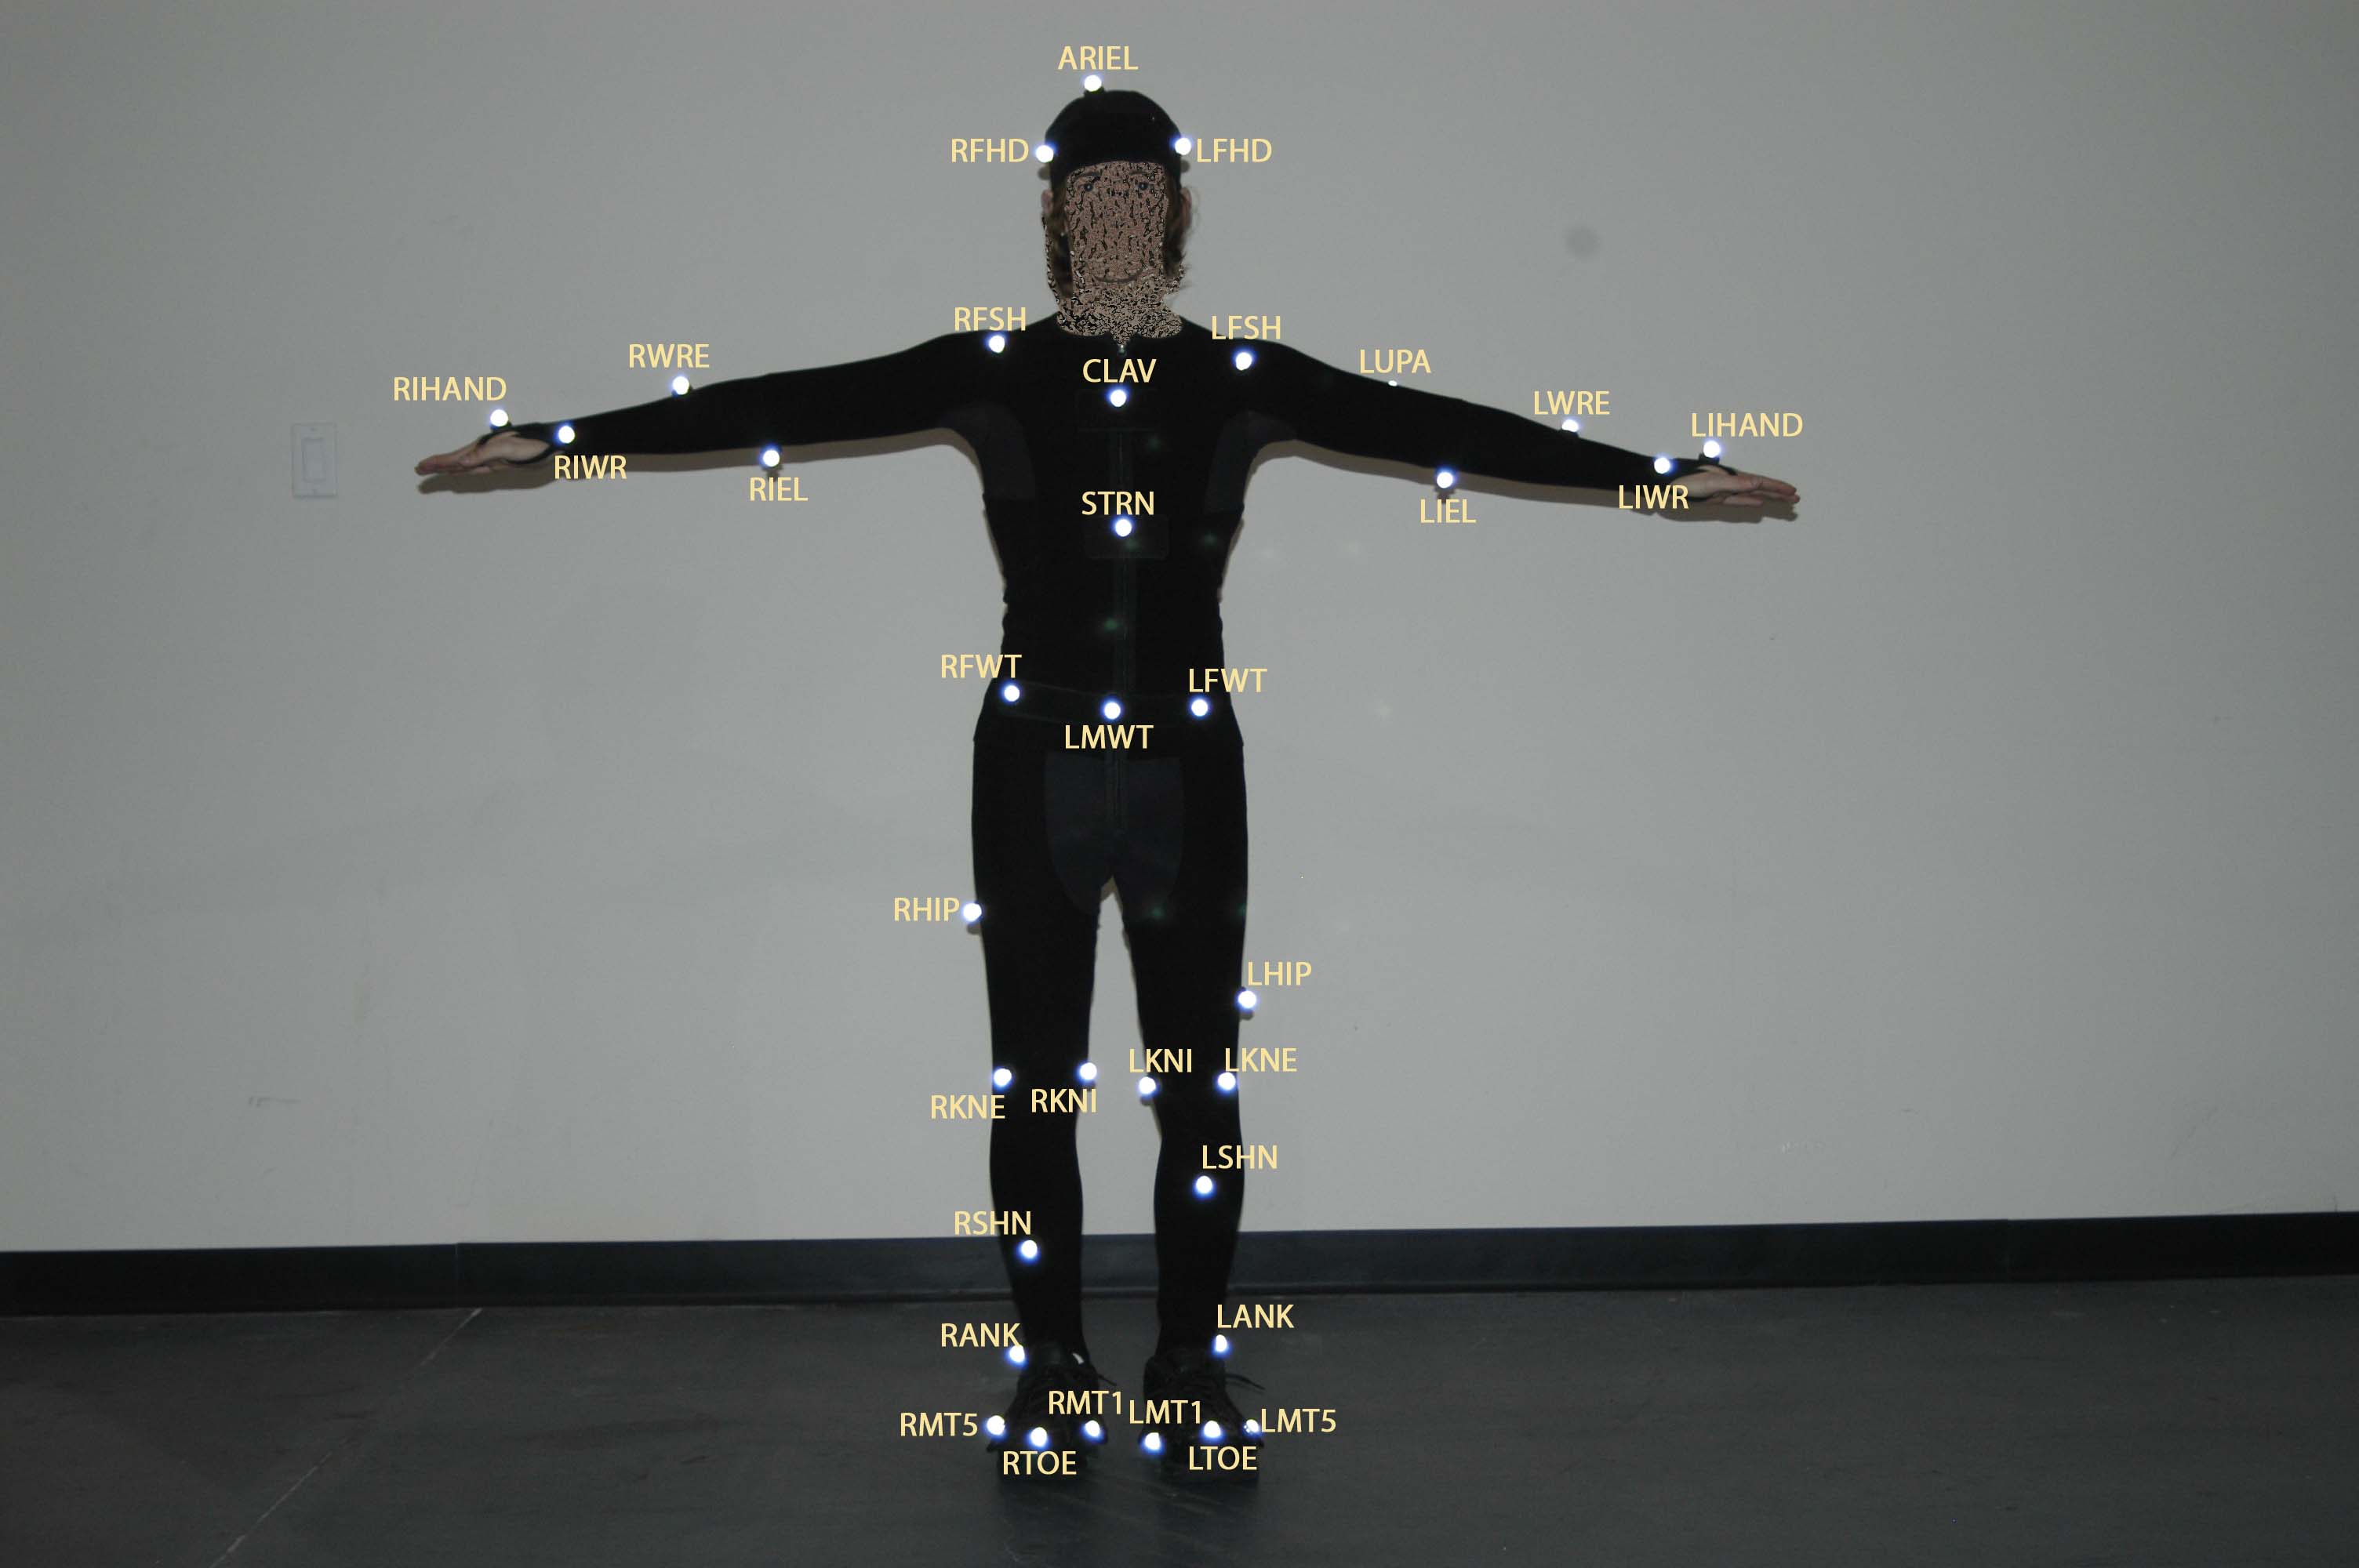
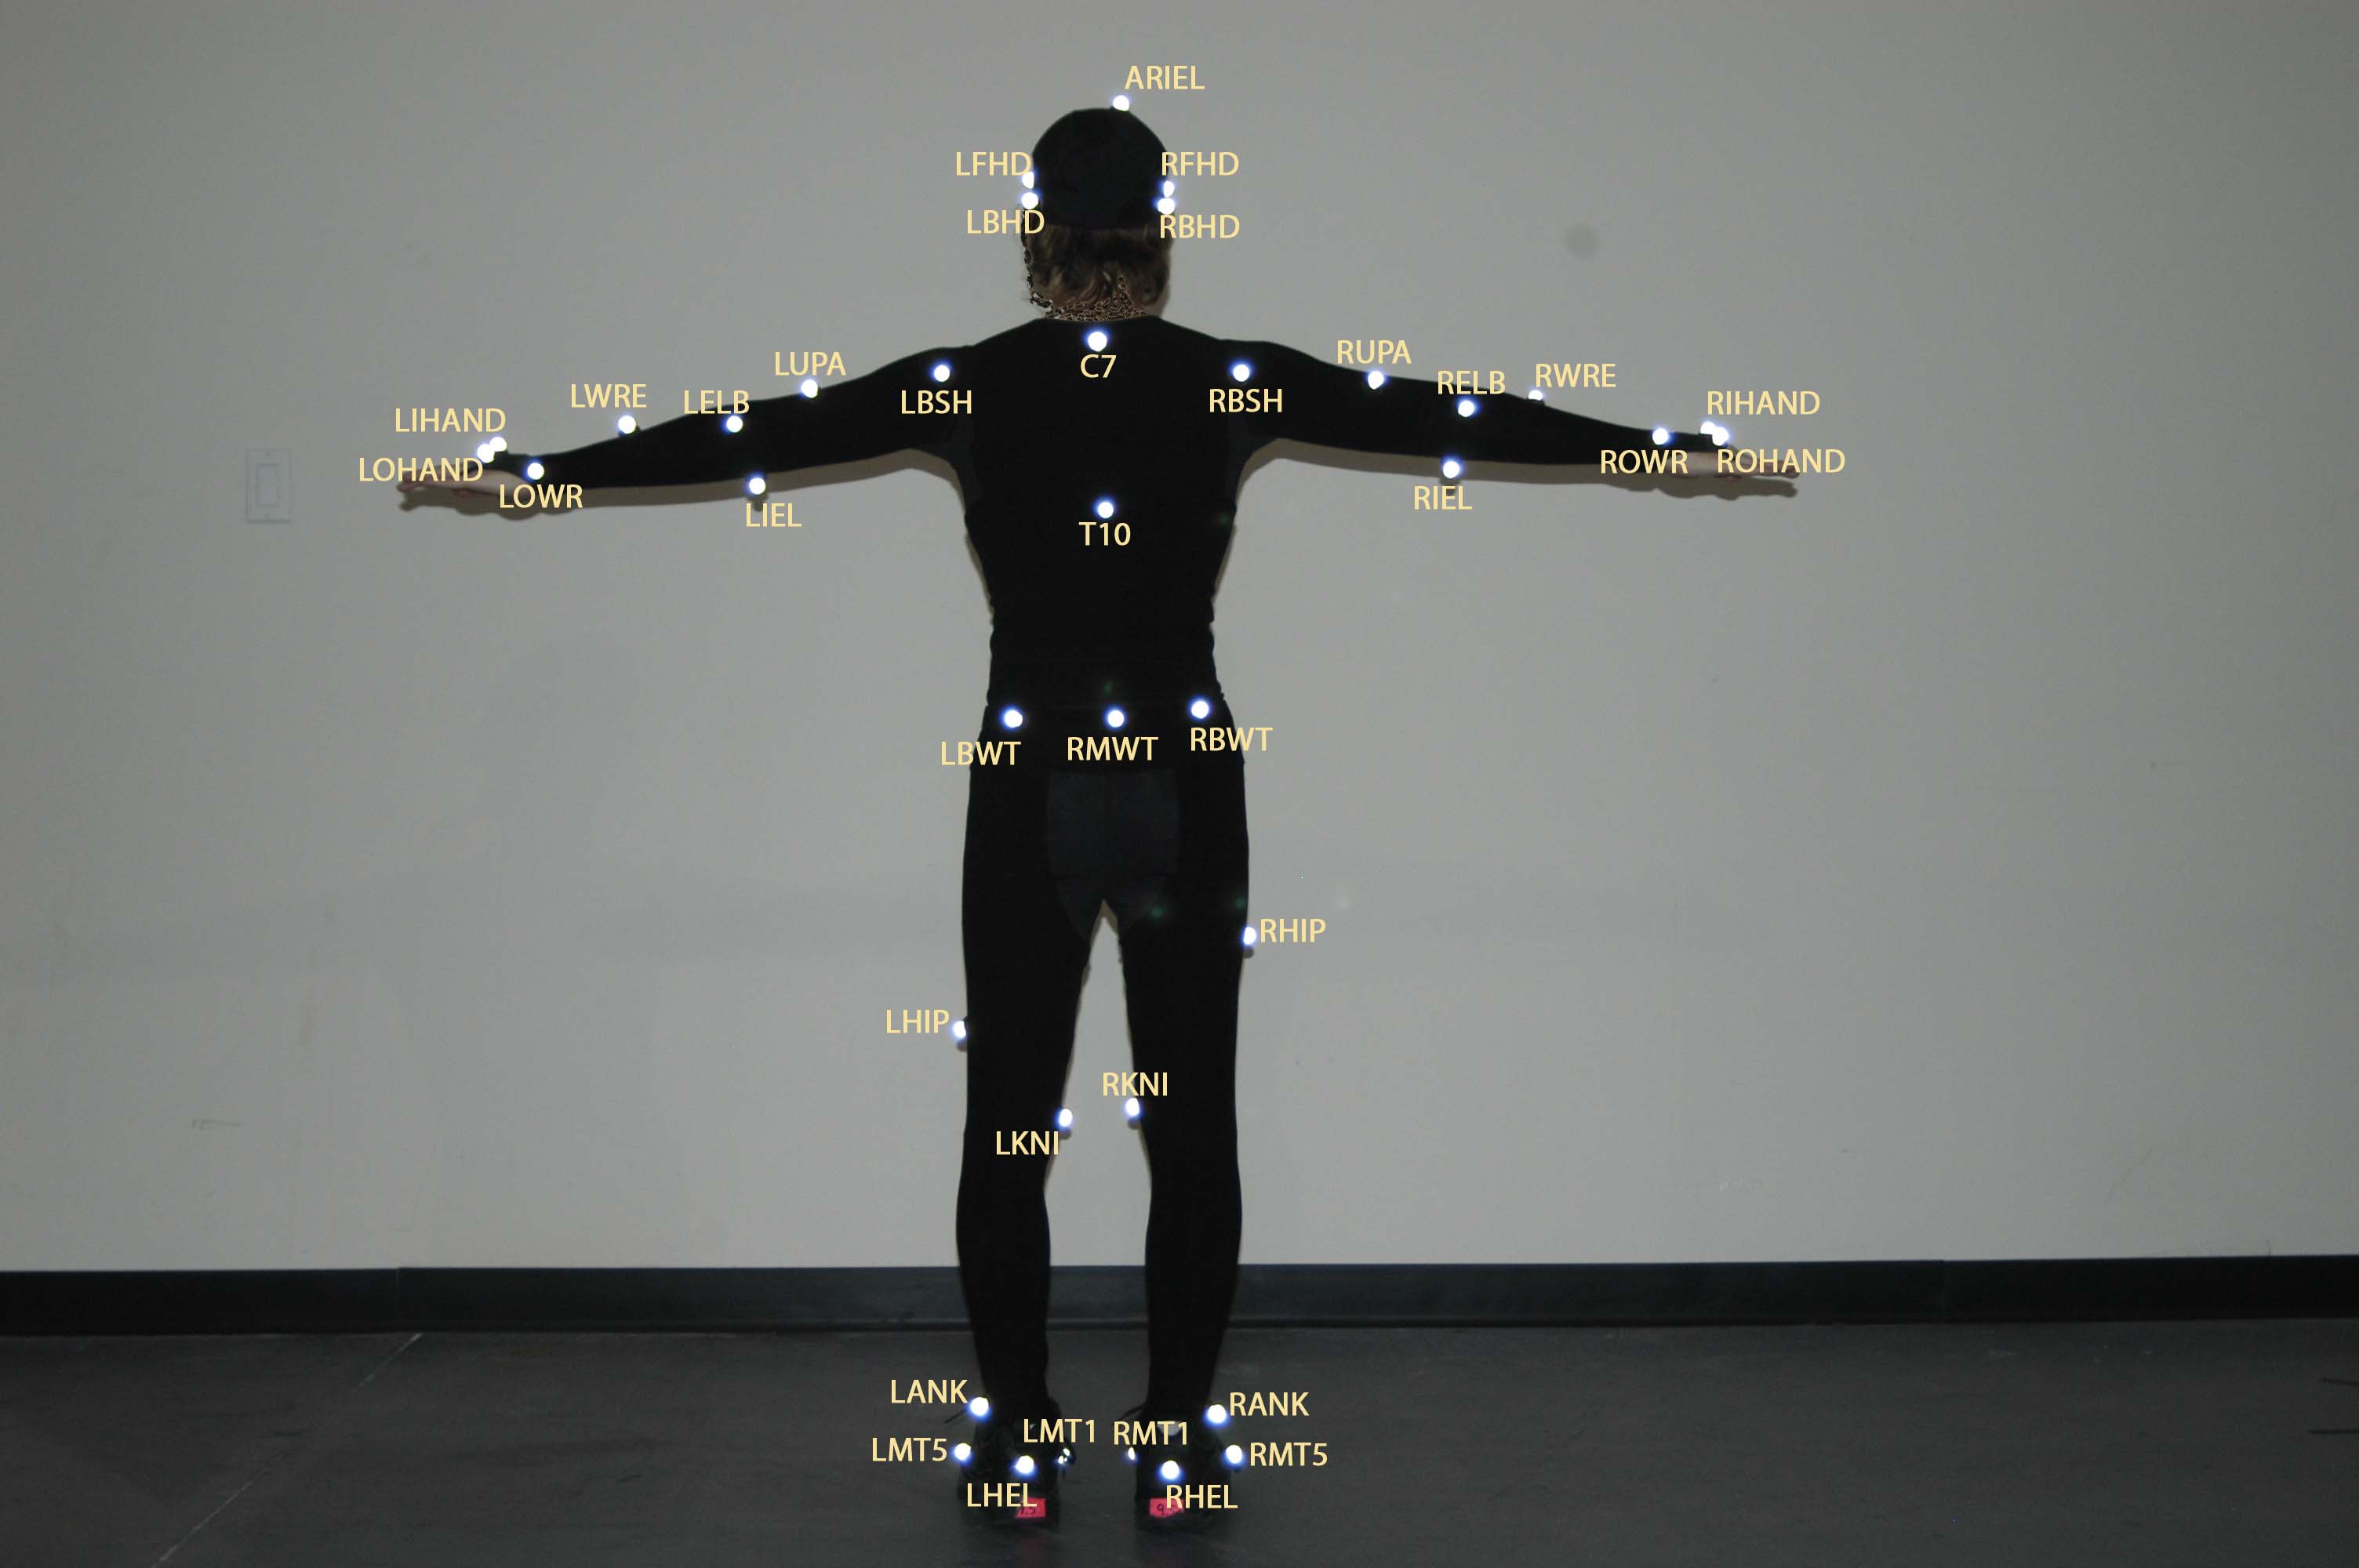
Typical Marker placement for a human subject:
CALIBRATION
- Open ROM file. If capture was done with Blade 2 and Cluster markers are present, it's best to delete them throughout the entire ROM take. (Cluster markers are typically 4-5 markers in a close configuration near a shoulder blade).
- In the Editors ribbon find Pipeline window. Choose Actor Calibration pipeline.
- Run the pipeline steps by doubleclicking on them or right clicking and selecting Run Selected. Run through the first two operations: Reconstruct.
- Select AutoVST_MakeVST but don't run it yet. In Parameters below the operations window rename default: BladeDefault into your desired subject name. Then run AutoVST_MakeVST.
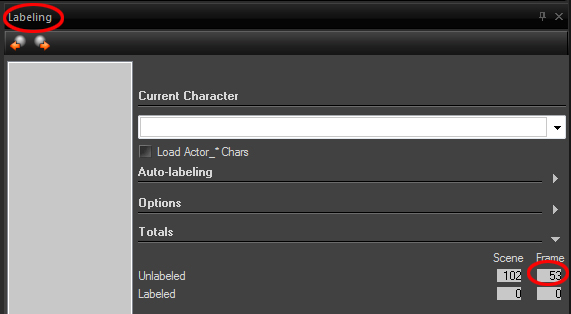
- Before running the TposeLabelROM you need to find a single frame where the subject is in T-pose and all 53 markers are present. Open Labeling Editor and at the bottom find Totals section. Expand it and look for the marker count for the current frame. Find a frame with Tpose and full marker visibility (53 for standard marker configuration). Then run TposeLabelROM.
- Roll over the labeled markers and check if the names are correct... Hand and wrist areas are more likely to get mislabelled as well as the general orientation of back and front. If everything appears ok run the Autolabel ROM operation.
- The last operation, CalibrateActor will create solvers that will translate marker translation data into joint rotation. Select the operation name and in Parameters specify Quality as Accurate.
- In Editors Ribbon find Character Management Window. Check that the name of your VSK is listed there in green. Calibration is complete when that's the case. The VSK file will be located in the same folder as your capture files.
POSTPROCESSING GENERAL TAKES
- Use Advanced Postprocessing Pipeline. Reconstruct the Take.
- In Character Management Window load the VSK you just created.
- Run Operations from AutoLabelTake through Filter Data. Then check the Autolabel accuracy. Relabel the markers if necessary*
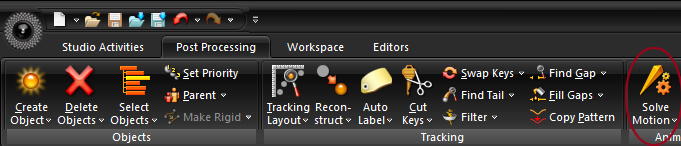
- SolveMotionOp. Examine theresults. If you find spots where the skeleton motion does not accurately reflect the marker motion, look for unlabeled markers. Label them.* Run the SolveMotionOp again to improve solving.
*LABELING AND RELABELING THE MARKERS TO IMPROVE THE SOLVE
Before manually labeling the take it's helpful to delete all short trajectories: at a rate of 120fps trajectories that are 0-50 frames long may be negligible. (10-20 frames is a safe bet).
In Pipelines Editor expand Available Operations/Default Ops. Select the desired Pipeline to add an operation DeleteUnlabeledMarkers (ie Advanced Post Processing). Double click on DeleteUnlabeledMarkers to add to the desired Pipeline.
Select DeleteBlankMarkers in the Pipeline list and see its Parameters. Change WithLessThenXKeys from 1 to 10-50. Double click DeleteBlankMarkers to run this operation.
At the bottom of the Labeling Editor you can see the Totals section, which will give you an idea about the unlabeled and labeled markers in the take.
To go through the take and find unlabeled markers you can scrub the timeline, go frame by frame (in case of detailed high speed motion) or use Find Next Unlabeled marker button in Labeling Editor.
When you have to manually label markers you need to select a marker and click on its name in the list in the Labeling panel. You can choose different Direction and Type in Labeling panel for different results.
Direction (Both, Forward or Backward) - determined the direction in which markers will be labeled in time relative to the time ticker. For most cases best option is Forward.
Type
- whole - lalels or unlabels the entire set of trajectories associated with a marker
- ranges - labels or unlabels the selected marker in selected ranges of time. Selection has to be made in Graph editor. For multiple ranges hold CTRL key.
- fragment - labels or unlabels a fragment of trajectory
- cliff - labels or unlabels a trajectory depending on the position of the time ticker and chosen Direction
In most cases Cliff is the best option.
Filling Gaps
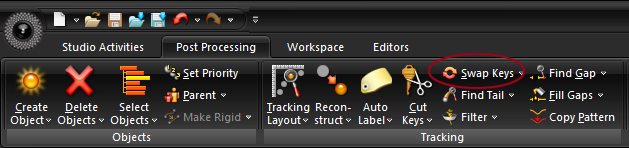
3. Sometimes a marker is completely missing for a period of time due to occlusion. In this case after markers are labeled, gaps can be filled. View Interpolated_Fill.avi and Rigid_Fill.avi in Y:\Courses\2012-2013\AC7102_Vita_SP13\BladeDocuments for instructions on filling gaps. You can also use Find Gap and Fill Gap buttons in Post Processing tab.
After filling gaps look at the generated marker movement. If it looks wrong, either undo the gap filling OR delete keyframes that correspond with the faulty movement in the Graph Editor by selecting the keyframes and pressing Cut Keys button (hold down to get to the Ranges option)
Swaps:
At times you can run into a marker(s) that is labeled incorrectly.
1. If this marker trajectory is not needed (ie a marker that fell on the floor has a wrong label that influences the solve. Such marker can be excluded from the solve entirely by unlabeling it and not labeling at all.)
To do so:
a. Find the beginning of the trajectory with incorrect label.
b. Make sure in Labeling Options the Direction is set to Forward.
c.
Select marker and click on Unlabel button (below the Marker name list in Labeling Editor).
2. If marker label needs to be replaced with the correct one:
a. Find the beginning of the trajectory with incorrect label.
b. Make sure in Labeling Options the Direction is set to Forward.
c.
Select marker and click on the desired marker name in Marker name list in Labeling Editor.
3. If two markers have swapped trajectories, you can select the time range for while this situation is present. (Hold and drag left and right margins on the timeline). Then select Markers and hold Swap Keys button to select Swap Ranges, select that and let go.
Repeated Solving
As you progress with cleaning you can continue resolving motion by using a SolveMotionOp Pipeline operation or Solve Motion button in Postprocessing. As more markers get labeled correctly and problematic markers unlabeled or removed you will see the Solve improving and character skeleton moving in a more realistic way. If some areas of the skeleton motion still don't look good, you will be able to correct that in Motionbuilder.