Texture Mapping
1. Surface Properties:
- color;
- transparency (opacity);
- bump/displacement;
- ambient light;
- incandescence;
- translucence;
- diffusion;
- specularity;
2. Shader (Shader networks)= Material + Textures
Window/Rendering Editors/ Hypershade
3. Textures:
- image-based (unique features and patterns)

- 2d procedural : 2d patterns, varying througout the surface of a model, described by a math algorithm: checker, cloth, ramp, etc
- 3d procedural: 3d patterns, varying througout the 3d space of a model, described by a math algorithm: wood, marble, elevation, etc)
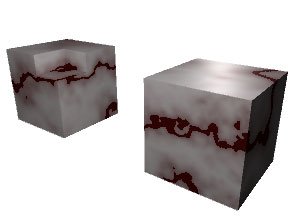
Image-based texture has to include a 2d file which commonly is a square. Pixel size of the square depends on the purposes of the texture. Texturing for games requires high optimization, so textures are smaller in size (16X16 to 512X512, very rarely 1024X1024px) and can have a .jpg or png compression. Texturing for film or video production depends on the desired level of detail and can range from 256X256 to 1024X1024px and higher. Texturing for film utilizes .tga, .tiff, or any other file format that does not have compression.
- tiling textures= repeating along the surface of an object;
4. UV mapping is a process of preparing a surface of a poly object for applying a 2d or image based texture. The image is a flat square, while the surface is three dimensional and uneven. The idea of fitting the texture square to the object/surface is very similar to using clothing patterns in sewing. Such pattern in computer graphics is called UV layout.

In Maya it consists of following steps:
1. mentally dividing the object's surface into smaller areas, that can be flat, cylindrical, or spherical, making face selection sets if necessary
2. making individual projections for these areas and combining resulting shells into a 0 to 1 texture coordinates space of anobject (sometimes entire model can be mapped with just one projection type)
3. avoiding overlaps in UVs as well as big gaps between UV shells
4. minimizing distortion in the texture (sometimes a grid-based reference texture (such as checker) is applying to control the degree of distorion);
5. using 0 to 1 texture space efficiently: shells should be as large as possible and placed as close to each other as possible;
5. Types of Projections:
Planar Projection -similar to video projection, texture is distributed as if it is laying on a flat surface.
Cylindrical Projection is appropriate for shapes similar to cylinders.
Spherical Projection is great for round objects.
Automatic Mapping - a combination of 3-12 simulataneous planar projections
6. Helpful metaphors:
- using patterns to cut fabric for sewing clothes;
- making a panoramic photo out of several smaller pictures;
- peeling a skin and unfolding it onto flat surface;
Texturing a Cube:
1. Create a cube.
2. Go into component mode –Uvs.
3. Cannot move them. They belong on the surface of the object. Can only be moved in 2d.
4. Open UV/UV Editor, in Maya 2018 this will open UV Editor and UV Toolkit. You can access the UV Toolkit tools through the top menus in the UV Editor and via righ-click pulldown menu.
5. Look at UV layout. All faces of a cube are laid out in a default T pattern.
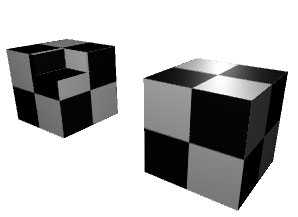
6. Open Windows/Rendering Editors/ Hypershade. Create a new material. In Attribute Editor click on a folder icon to the right of Color. Select black_dice_surprise.tga image file. Assign material to cube by middle mouse dragging it from the Hypershade and releasing over the cube in the Perspective view.
7. Check UV editor again.You should see the texture file underneath the UVs. Try Image/Dim to see the UVs better.
8. Try planar mapping on individual faces. Select one face at a time and go UV/Planar Projection. Experiment projecting from different axis and camera.
9. To select UV shell, select one UV then right click and Select/Components/UV shell. Or select a single UV, right click/Convert/To UV Shell.
10. Hold down "x" on the keyboard to snap UVs to grid, when desired.
11. Try automatic mapping with 6 projection planes.
12. Place individual shells correctly onto a texture map.
LAYING OUT UVs FOR THE HAPPINESS FIGURINE